Intro.
In Part 1, we designed the Walsh Retail AI Agent architecture, set up Cloud SQL as the operational database (stage_db), and created the BigQuery schema (ai_agent_db). By the end of Part 1, we had a clean database layer ready to serve as the foundation for the entire pipeline.
In Part 2, we build the Data Engineering Pipeline — the layer that moves data from the operational system into the analytical layer in real time, transforms it into ML-ready features, and orchestrates the entire process automatically. This is where the architecture becomes a live, running system.
In Part 1, Cloud Composer (managed Apache Airflow) was listed as the orchestration tool. After evaluating cost and GCP-native alternatives, this project uses Cloud Workflows instead.
Cloud Composer costs ~$1.12/hour (always-on environment), adding up to ~$800/month for a portfolio project. Cloud Workflows is serverless, GCP-native, and provides the same pipeline orchestration at near-zero cost (5,000 steps free/month).
For production multi-cloud environments or complex Python-based DAGs, Cloud Composer (Airflow) remains the right choice. For GCP-native pipelines like this one, Cloud Workflows is the more practical and cost-efficient solution.
0. Pipeline Overview
The diagram below shows the full Part 2 data engineering pipeline. Cloud SQL (completed in Part 1) feeds data into the pipeline via Datastream CDC. Cloud Workflows orchestrates the entire pipeline — from CDC through ETL to the final ML-ready feature store.
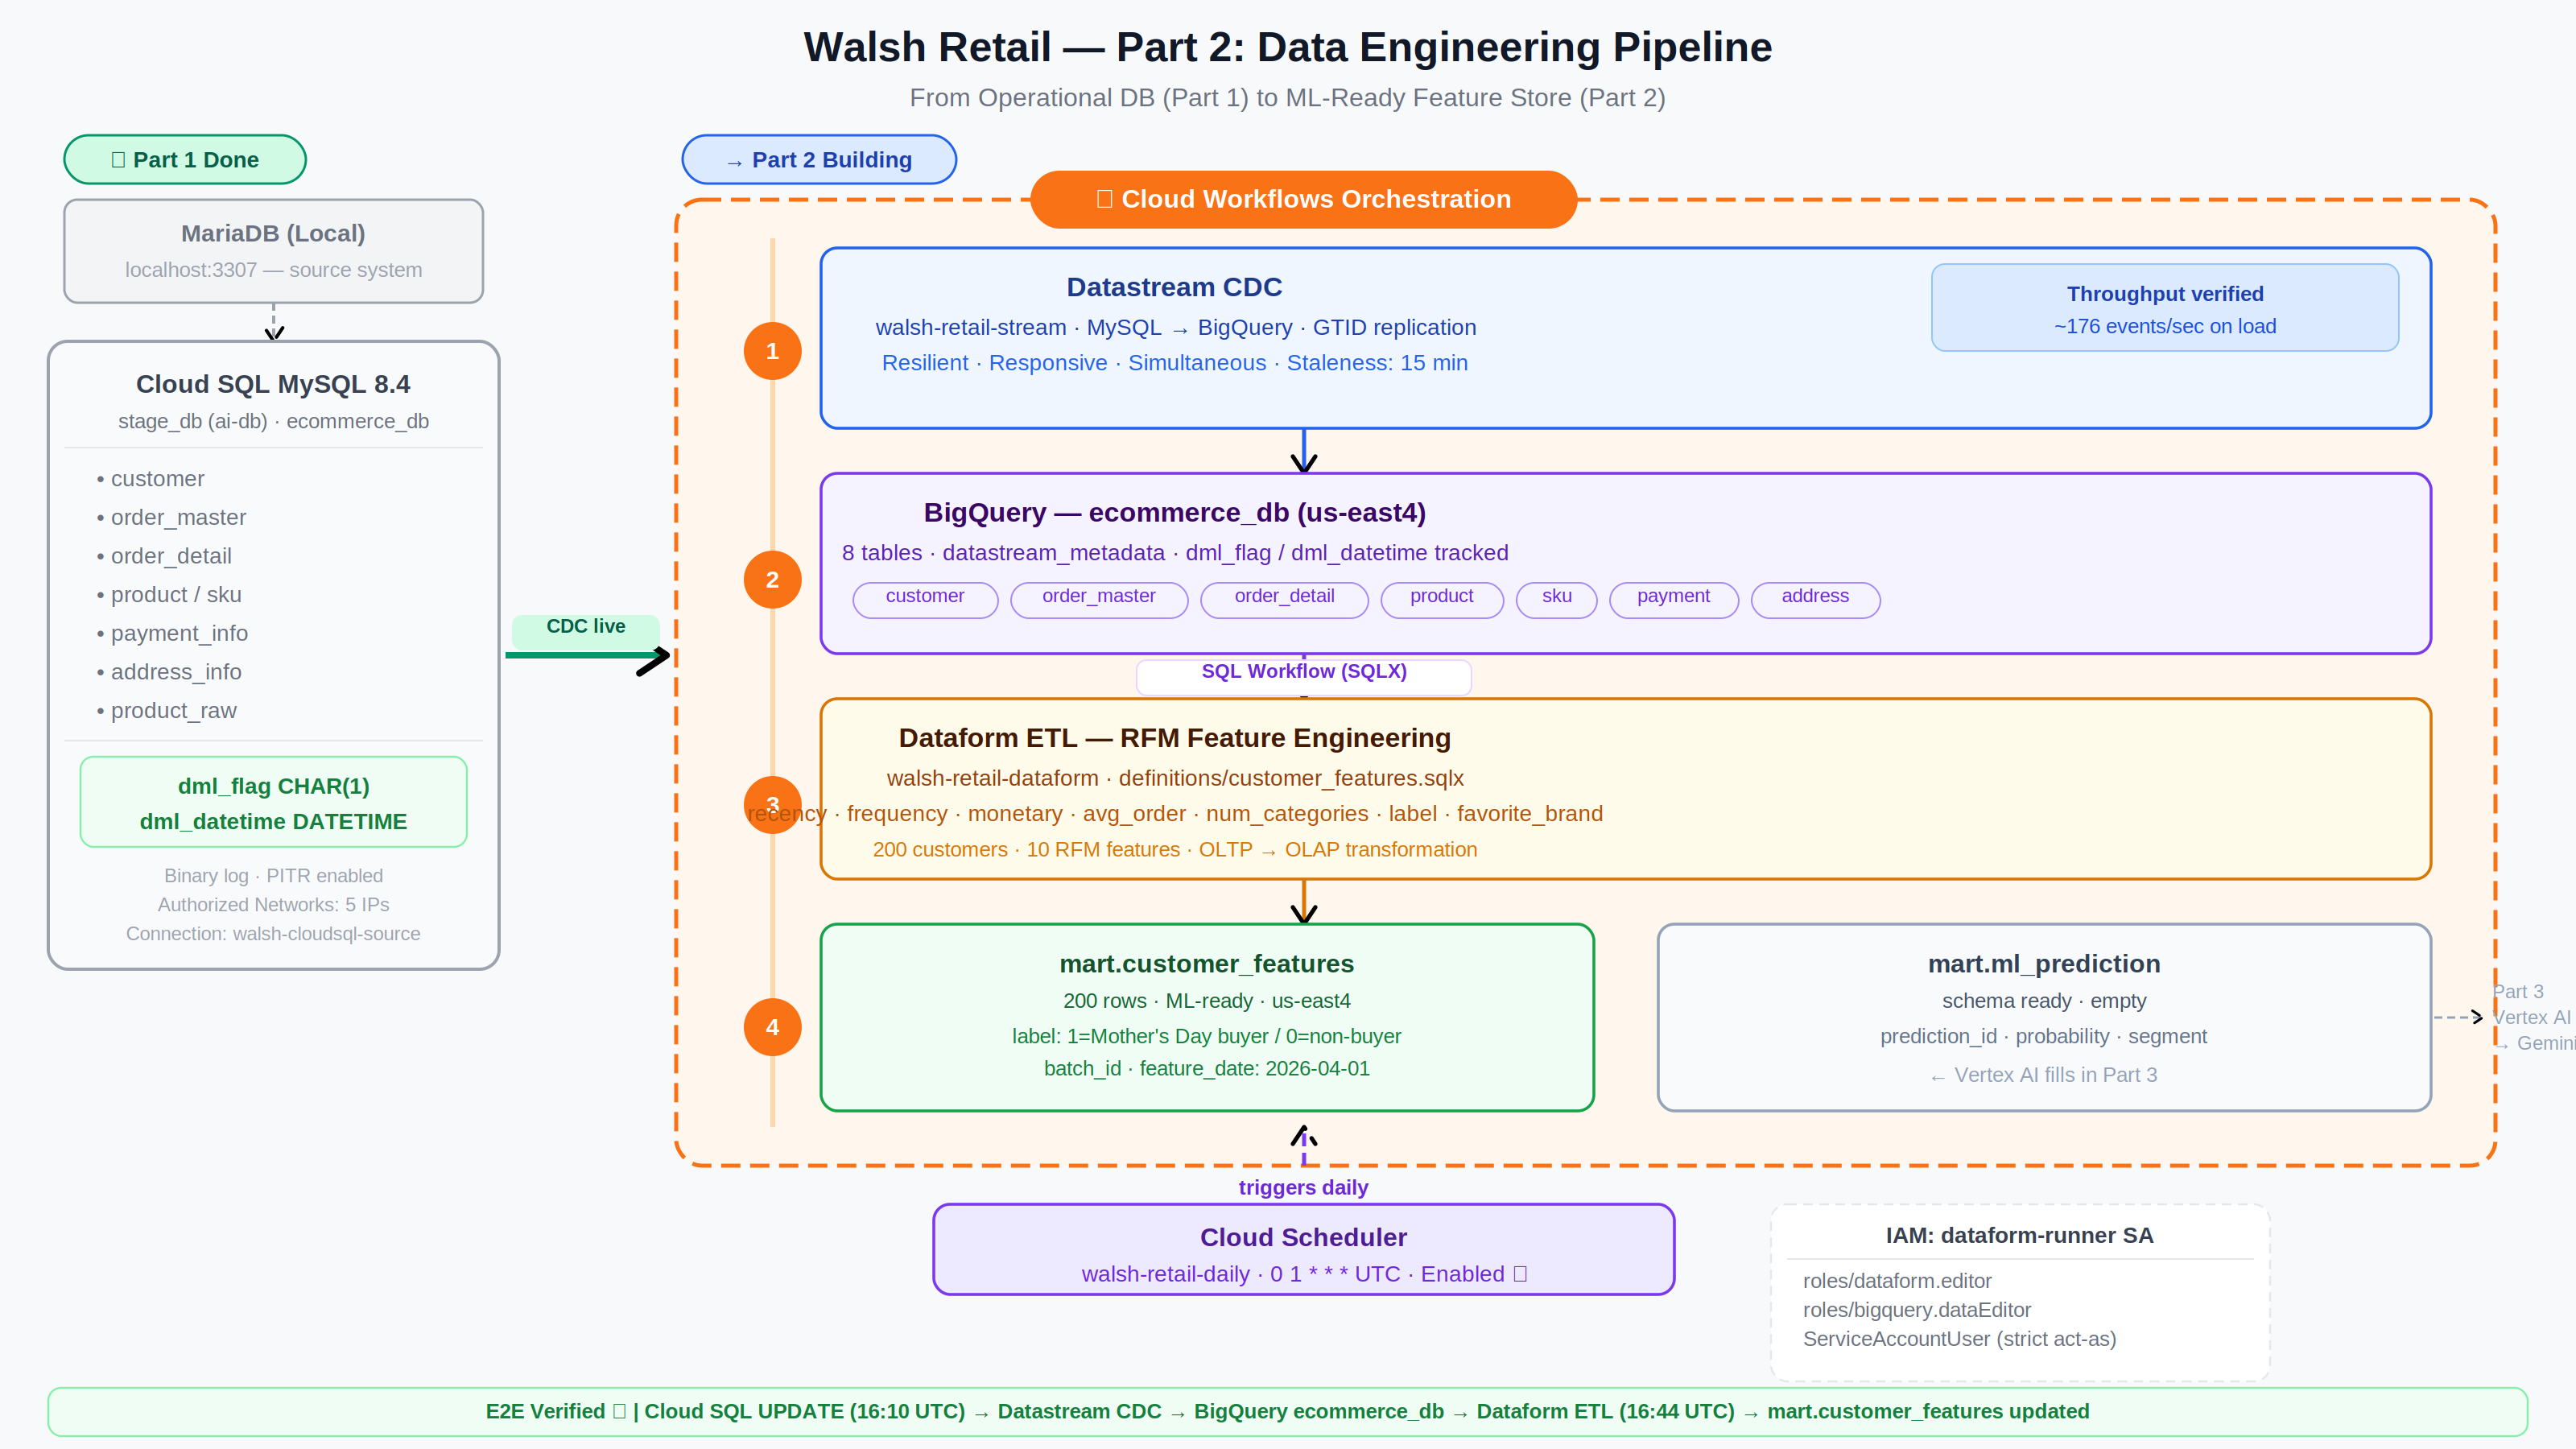
Figure 0. Walsh Retail Part 2 — Data Engineering Pipeline Overview
1. What Is a Data Pipeline — and Why Do We Need One?
A data pipeline is an automated system that moves data from one place to another — collecting, transforming, and loading it so it is always available in the right format at the right time. Without a pipeline, data sits in the operational database and never reaches the analytical tools that need it.
In the Walsh Retail system, the pipeline has three jobs:
- Capture — Move data from Cloud SQL to BigQuery in real time (CDC)
- Transform — Convert raw transactional data into ML-ready features (ETL)
- Automate — Run the entire process automatically on a daily schedule (Orchestration)
2. Pipeline Architecture Overview
The Part 2 pipeline consists of four layers working in sequence:
| Layer | Service | Role |
|---|---|---|
| Capture | Datastream CDC |
Streams every insert, update, and delete from Cloud SQL to BigQuery in real time |
| Transform | Dataform |
Converts raw ecommerce_db data into ML-ready RFM features in mart.customer_features |
| Orchestrate | Cloud Workflows |
Connects Dataform and downstream steps into a single governed pipeline |
| Schedule | Cloud Scheduler |
Triggers the pipeline automatically every day at 01:00 UTC |
Data flows in one direction: Cloud SQL → Datastream → BigQuery (ecommerce_db) → Dataform → BigQuery (mart) → Vertex AI (Part 3)
3. Datastream CDC — Real-Time Change Data Capture
3.1 What Is CDC and Why Datastream?
Change Data Capture (CDC) is a technique that captures every insert, update, and delete from a source database and streams those changes to a destination in real time — without batch jobs, without manual exports, and without impacting the operational system.
Datastream reads from Cloud SQL's binary log (binlog), which MySQL writes automatically for every committed transaction. Three properties make this the right choice:
- Resilient — if interrupted, it resumes exactly where it left off. No data gap, no duplicate load.
- Responsive — changes appear in BigQuery within seconds of the source transaction, not hours.
- Simultaneous — the operational database continues serving transactions while CDC streams in the background, invisibly.
3.2 Prerequisites — Enabling Binary Log
Datastream requires MySQL binary logging. For Cloud SQL Enterprise edition, enable Point-in-time Recovery (PITR) to activate binary logging, and set the retention flag:
Navigation: GCP Console > SQL > ai-db > Edit > Flags > Add flag: binlog_expire_logs_seconds = 604800 > Save

Figure 3.1. Cloud SQL ai-db — binlog_expire_logs_seconds = 604800 Settings
Cloud SQL Free Trial instances do NOT support Point-in-time Recovery (PITR) or binary logging. Attempting to enable PITR returns:
"The following Operation(s) are not allowed for Cloud SQL Free Trial Instance: [Pitr, Backup Configuration]"Solution: Delete the Free Trial instance and create a new Cloud SQL Enterprise edition instance (1 vCPU, 3.75GB, ~$0.09/hour). Always Stop the instance when not in use to minimize cost.
3.3 Datastream IP Allowlisting
Before creating the connection profile, add Datastream's IP addresses to Cloud SQL's Authorized Networks:
- 34.145.160.237/32
- 35.245.110.238/32
- 34.150.213.121/32
- 34.85.182.28/32
- 34.150.171.115/32
Navigation: GCP Console > SQL > ai-db > Connections > Networking > Authorized networks > Add network > Save
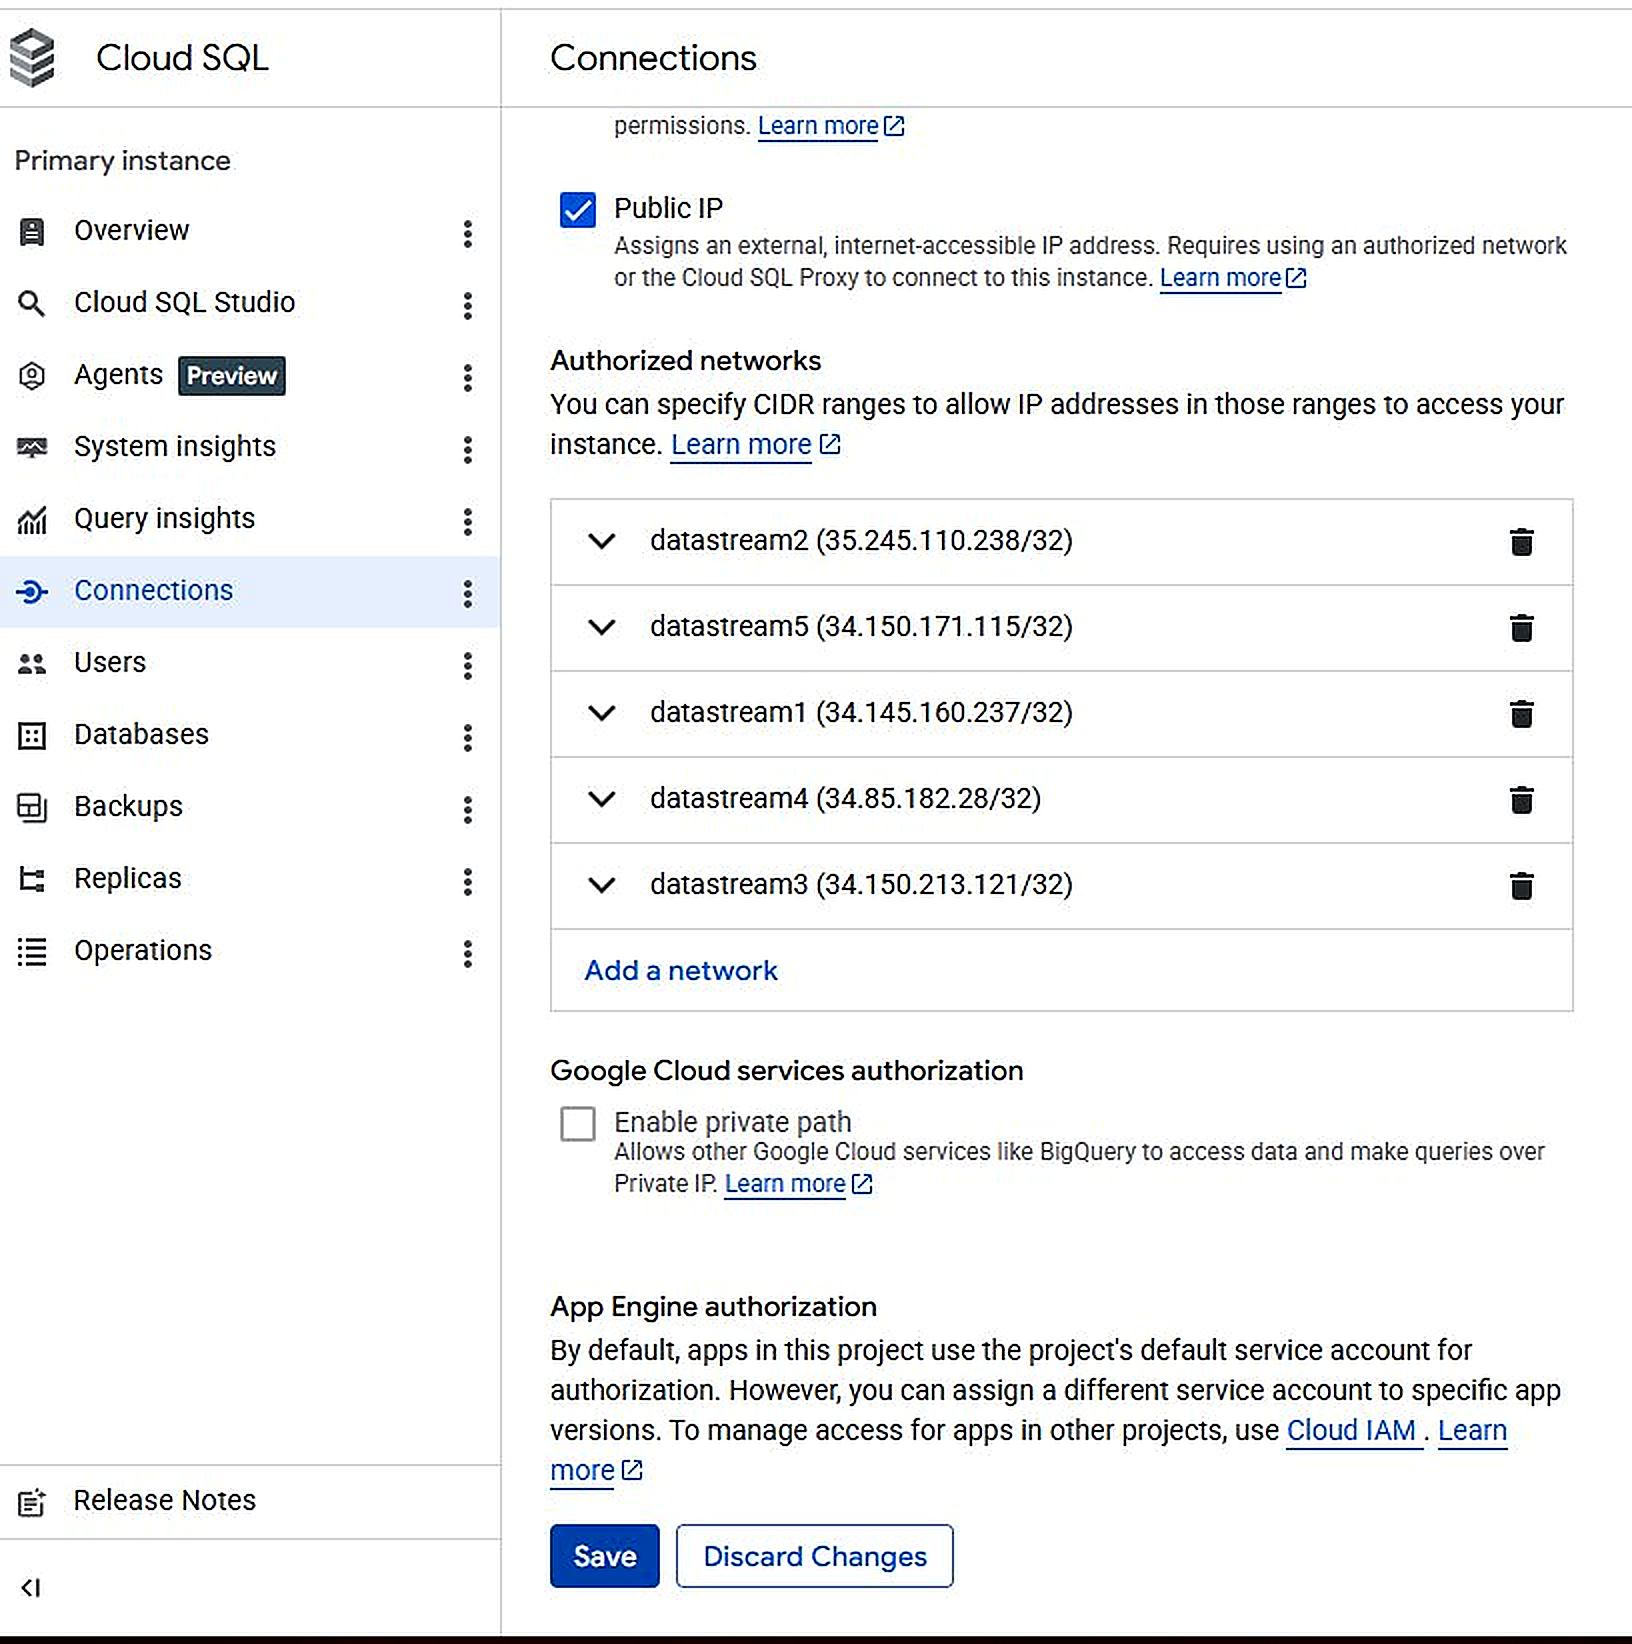
Figure 3.2. Cloud SQL Authorized Networks — 5 Datastream IPs registered
Always retrieve the correct IPs from the Datastream connection profile creation wizard. The wizard displays the exact IPs to allowlist for your chosen region. Do not hardcode IPs from documentation — they may differ by region and change over time.
3.4 Connection Profiles
Two connection profiles define how Datastream connects to the source and destination:
| Profile | Type | Details |
|---|---|---|
walsh-cloudsql-source |
MySQL (Cloud SQL) | IP: 35.238.13.170, Port: 3306, User: admin, Region: us-east4 |
walsh-bigquery-dest |
BigQuery | Project: isupernova-ai, Region: us-east4, Dynamic dataset routing |
Navigation: GCP Console > Datastream > Connection profiles > Create profile > MySQL > Enter settings > Test > Create
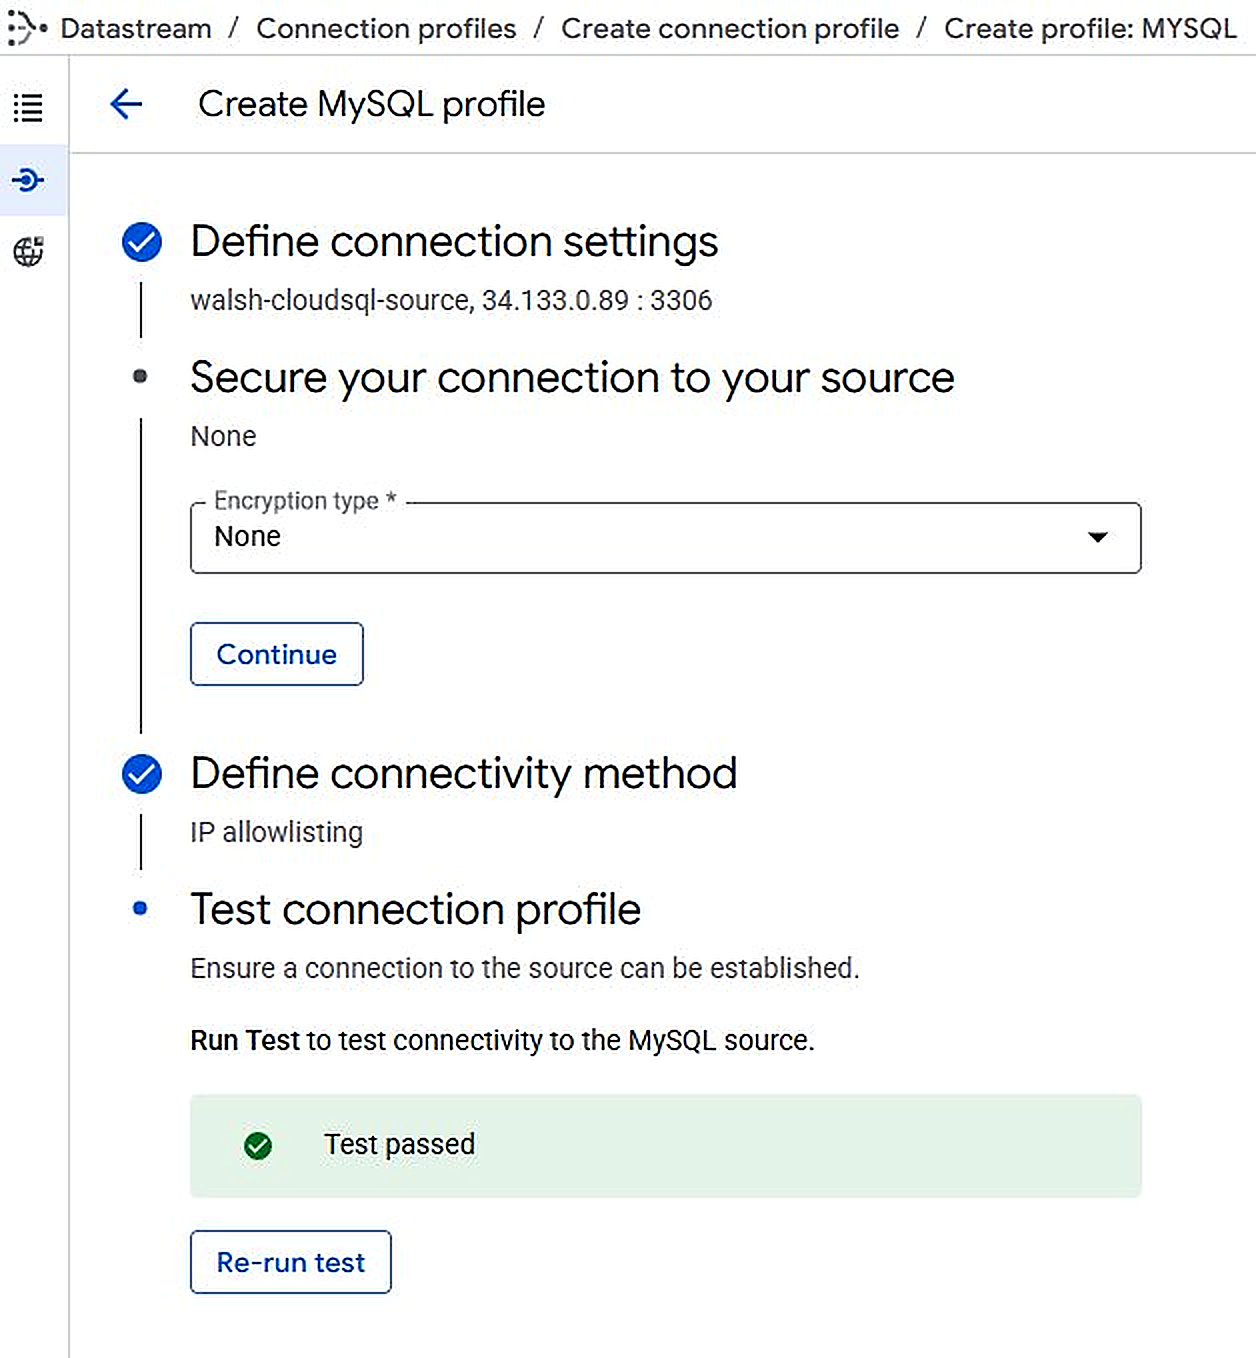
Figure 3.3. Datastream — walsh-cloudsql-source Connection test passed

Figure 3.4. Datastream — walsh-cloudsql-source profile created
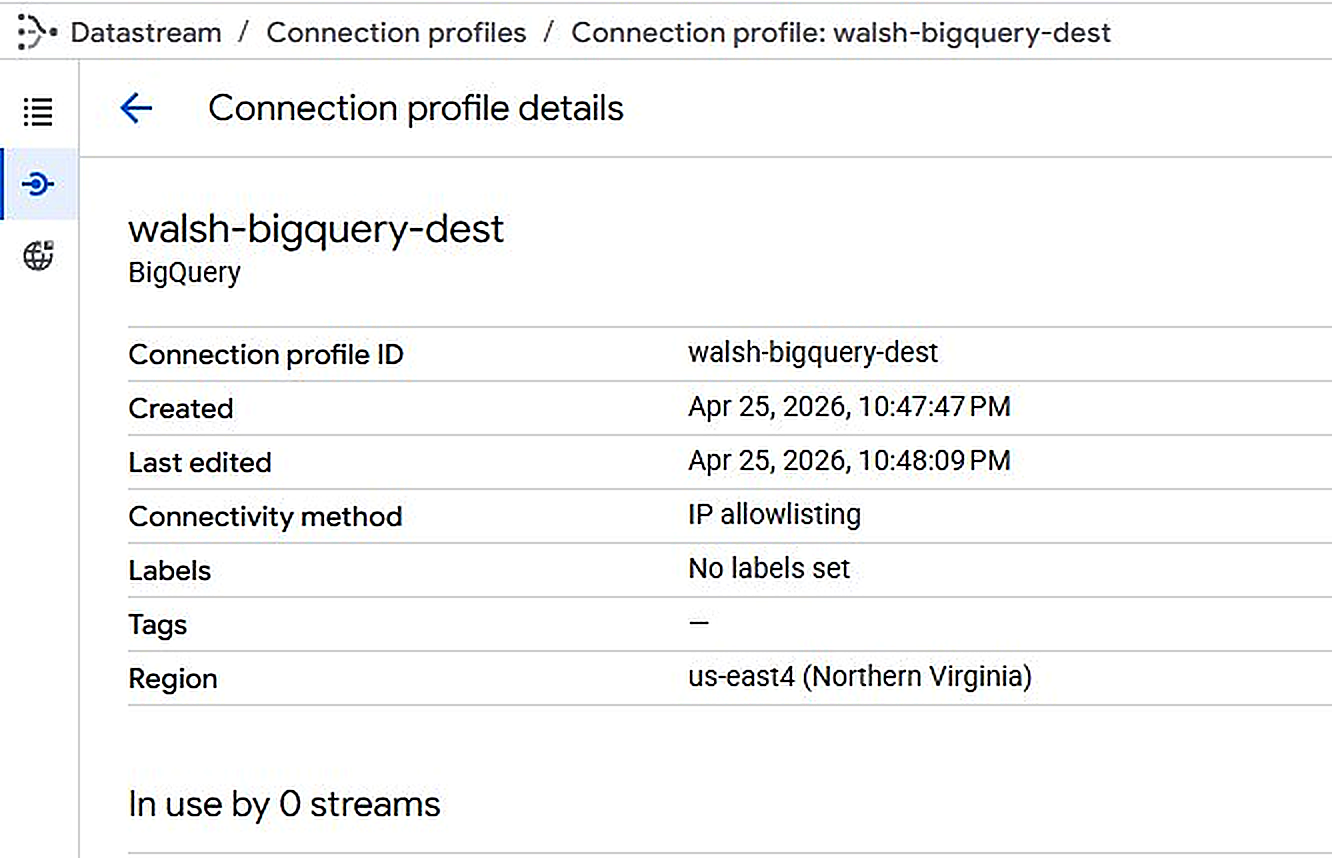
Figure 3.5. Datastream — walsh-bigquery-dest profile created
3.5 Creating and Starting the Stream
| Setting | Value |
|---|---|
| Stream name | walsh-retail-stream |
| CDC method | GTID-based replication |
| Objects to include | ecommerce_db (all 8 tables) |
| Backfill mode | Automatic |
| Destination dataset | Dynamic, based on source schema |
| Stream write mode | Merge |
| Staleness limit | 15 minutes |
Navigation: GCP Console > Datastream > Streams > Create stream > Configure > Select source/dest profiles > Select tables > Create & Start
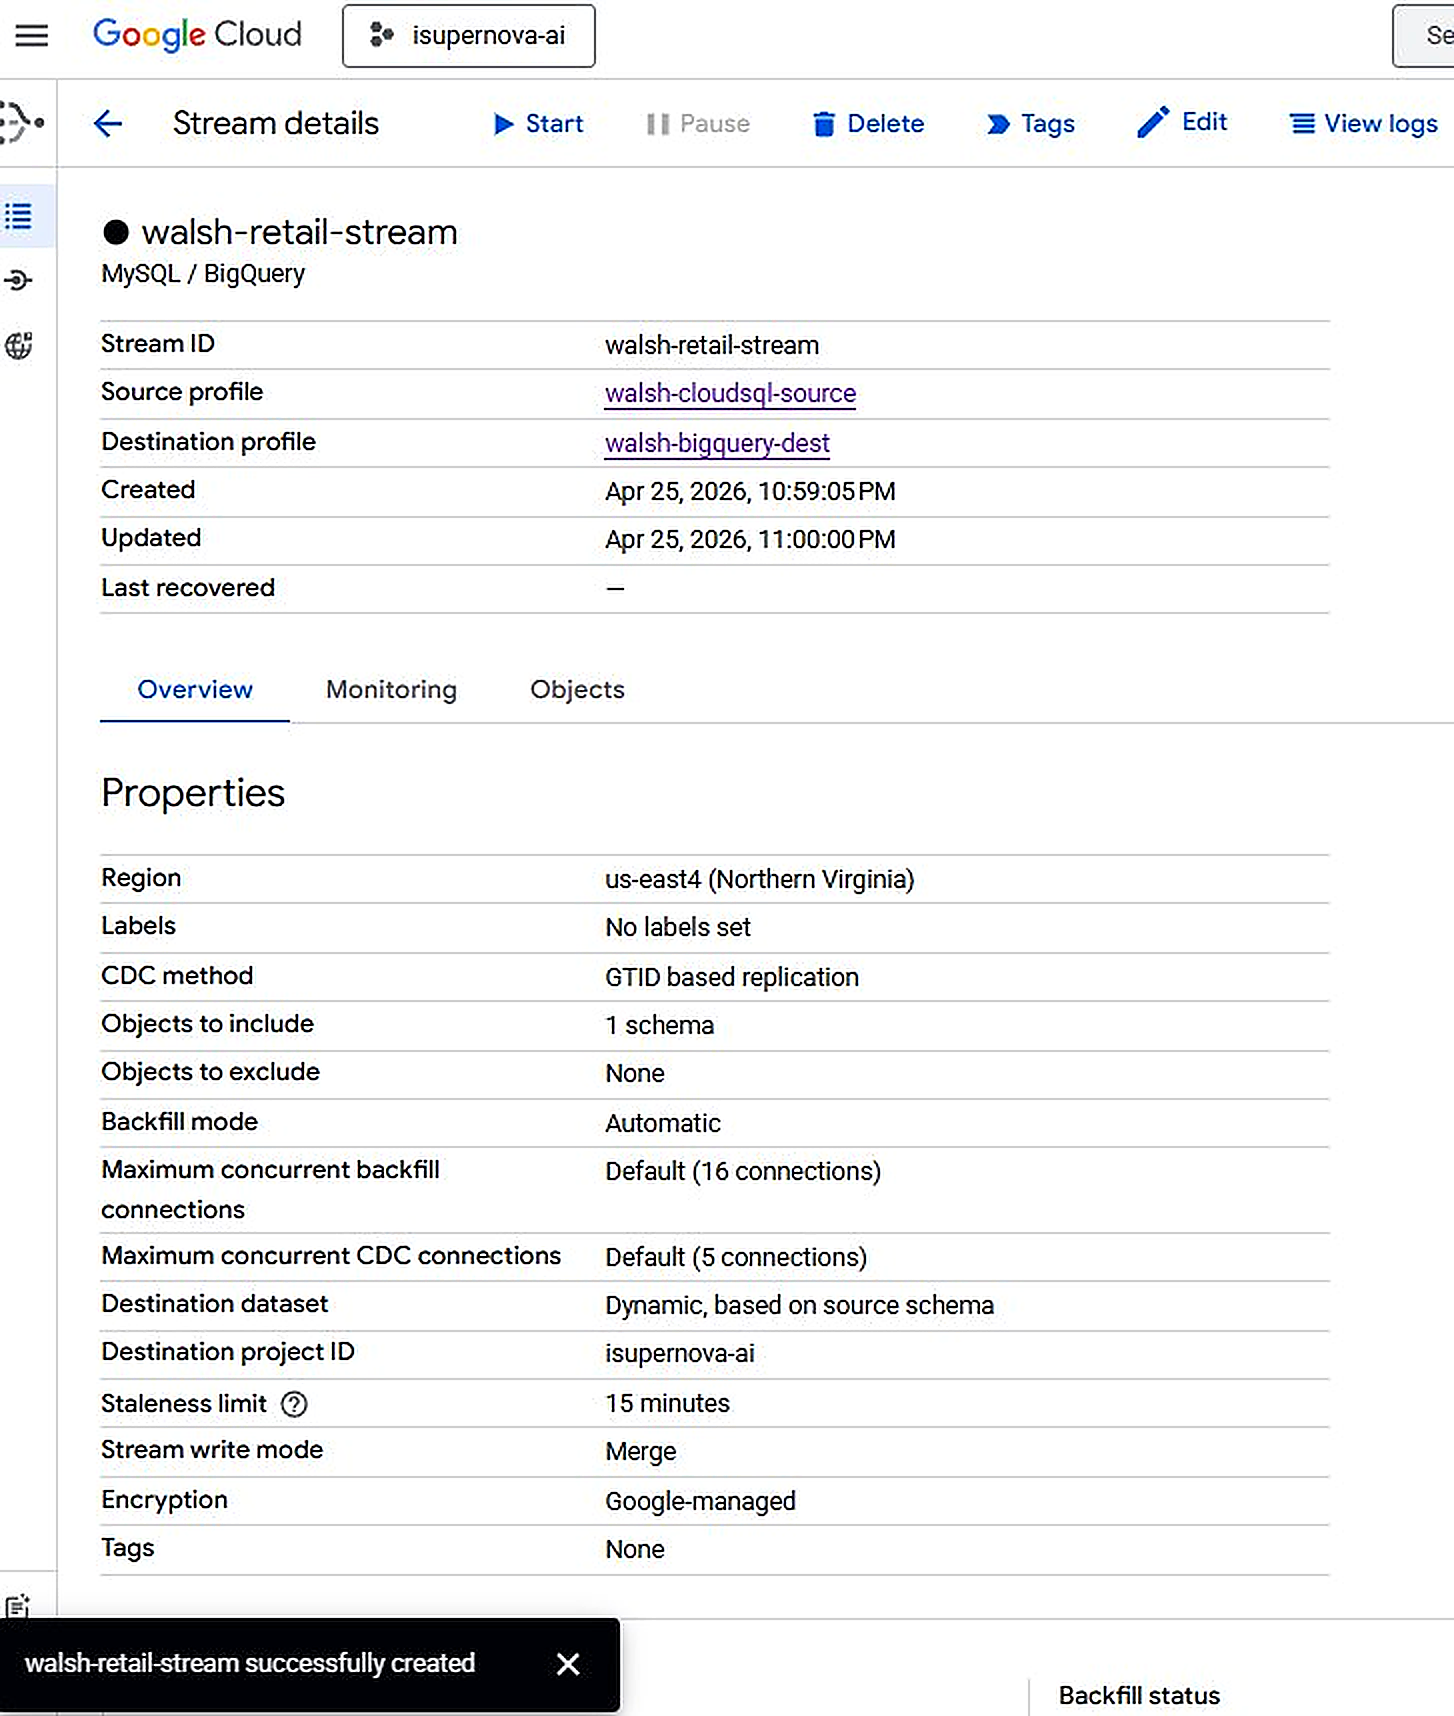
Figure 3.6. walsh-retail-stream — Stream started successfully
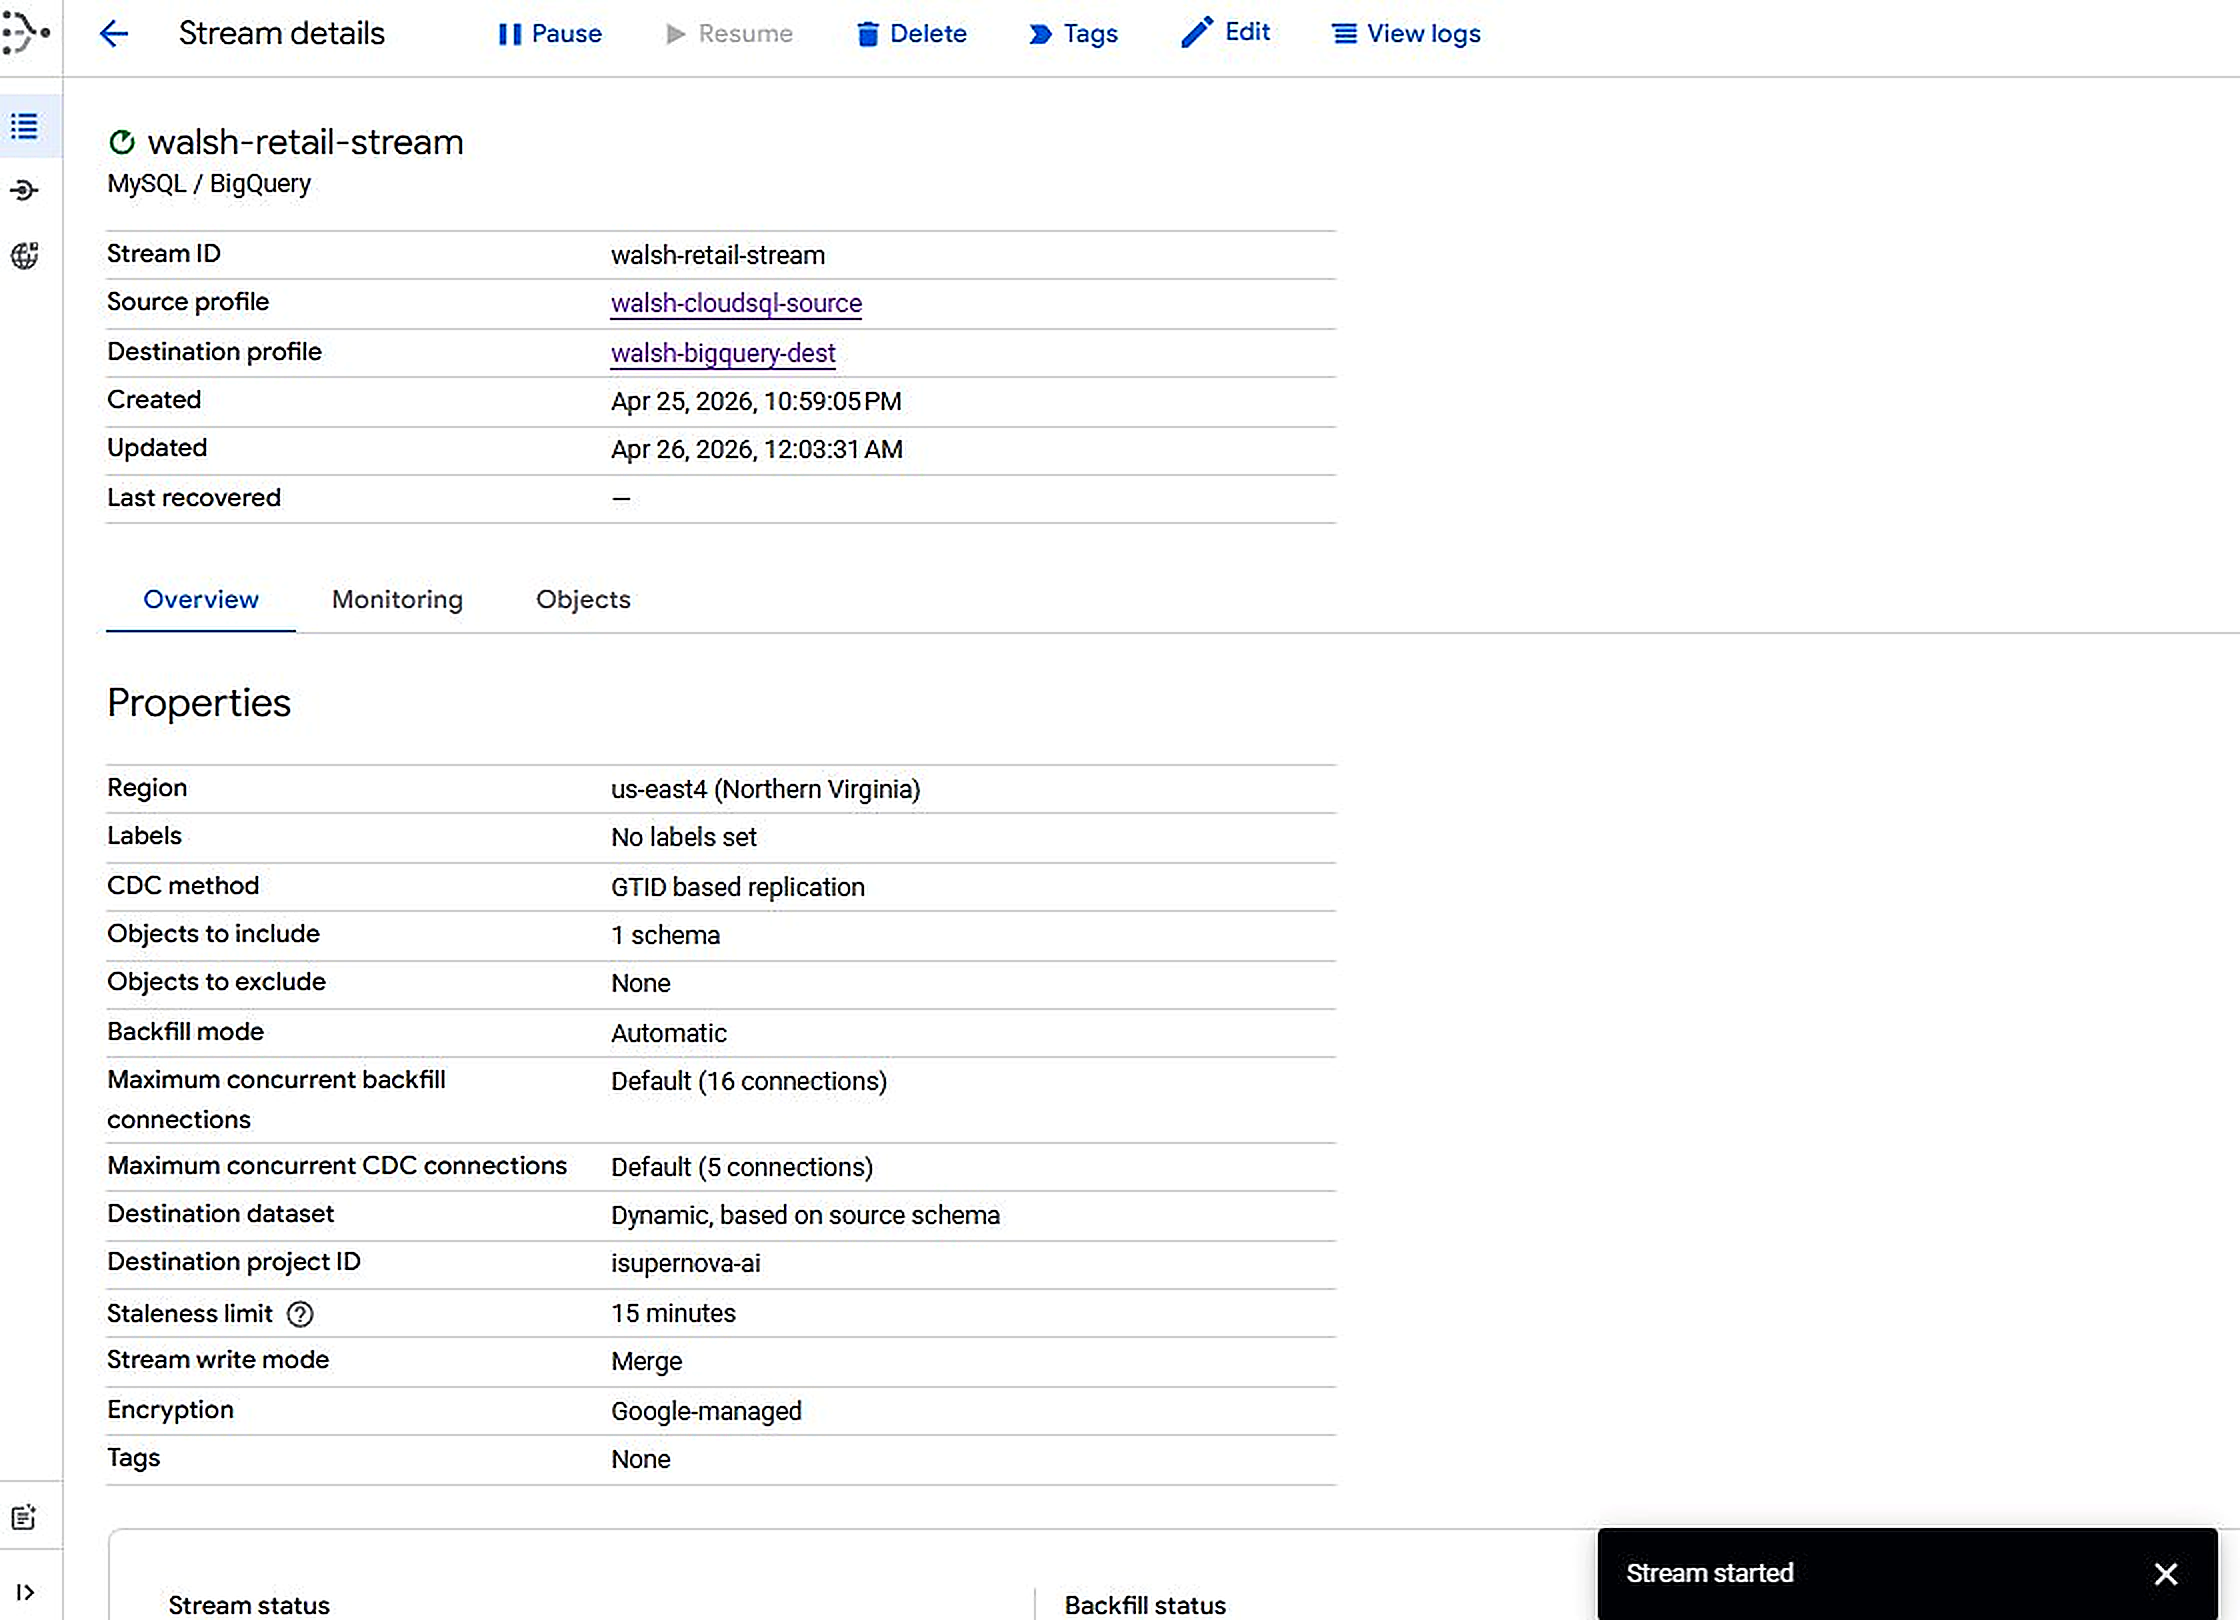
Figure 3.7. walsh-retail-stream — RUNNING, Throughput ~176 events/sec on initial backfill
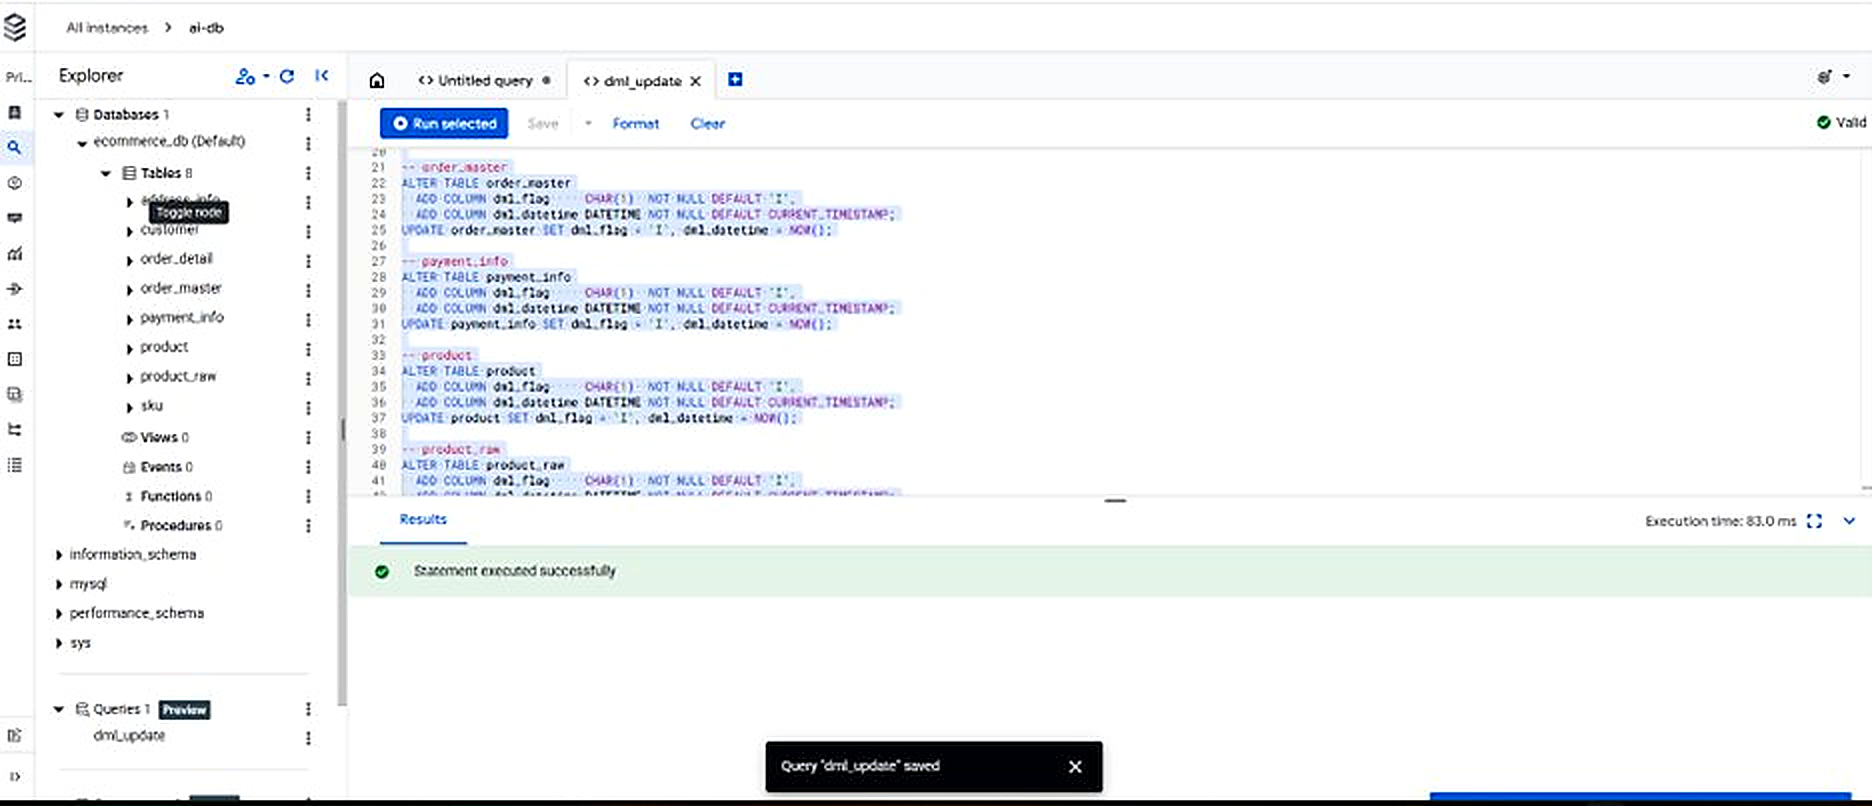
Figure 3.8. BigQuery ecommerce_db — CDC data loaded with datastream_metadata column
4. Dataform ETL — OLTP to OLAP Transformation
4.1 Why Dataform?
Raw CDC data in BigQuery mirrors the operational schema — normalized, transaction-optimized, and not suitable for ML training directly. Dataform transforms this raw data into a denormalized, analytics-ready feature table using SQLX — SQL with metadata config blocks that define transformations as versioned, testable assets native to BigQuery.
4.2 What Is SQLX?
SQLX is Dataform's file format — it's standard SQL with a config {} block at the top that tells Dataform what to create and where to put it. Think of it as SQL + deployment instructions in one file.
A SQLX file has two parts:
config {
type: "table", // create as a permanent BigQuery table
schema: "mart", // destination dataset
name: "customer_features", // destination table name
description: "Customer RFM features for ML training"
}
-- Part 2: standard SQL (the actual transformation)
SELECT
o.Customer_ID AS customer_id,
DATE_DIFF(DATE('2026-04-01'), MAX(DATE(o.Order_Date)), DAY) AS recency_days,
COUNT(DISTINCT o.Order_No) AS frequency,
ROUND(SUM(od.Net_Order_Amt), 2) AS monetary,
...
FROM `isupernova-ai.ecommerce_db.order_master` o
JOIN `isupernova-ai.ecommerce_db.order_detail` od ON o.Order_No = od.Order_No
JOIN `isupernova-ai.ecommerce_db.product` p ON od.Product_ID = p.Product_ID
WHERE o.dml_flag <> 'D'
GROUP BY o.Customer_ID, fb.favorite_brand
When you click Start execution in the Dataform workspace, it compiles this SQLX into a BigQuery job and runs CREATE OR REPLACE TABLE isupernova-ai.mart.customer_features AS (SELECT ...) automatically. No manual DDL needed.
You could run the same SQL directly in BigQuery Studio and it would work. The difference is governance — Dataform tracks versions, manages dependencies between tables, and integrates with Cloud Workflows for automated execution. For a single table it may seem like overkill, but as the pipeline grows (mart → campaign → vector), Dataform ensures each table is rebuilt in the correct order with full lineage tracking.
4.2 RFM Feature Engineering
The core transformation produces mart.customer_features — one row per customer with 10 RFM features for the Random Forest model:
| Feature | Description | Source |
|---|---|---|
recency_days |
Days since last purchase before Apr 1, 2026 | order_master.Order_Date |
frequency |
Total distinct orders | COUNT(DISTINCT Order_No) |
monetary |
Cumulative net revenue | SUM(Net_Order_Amt) |
avg_order_value |
Average order amount | AVG(Net_Order_Amt) |
max_order_value |
Highest single order | MAX(Net_Order_Amt) |
num_categories |
Distinct product categories | COUNT(DISTINCT Category) |
total_items |
Total items purchased | SUM(Order_QTY) |
avg_discount_rate |
Average discount ratio | AVG(Discount_Amt / Order_Amt) |
favorite_brand |
Most purchased brand | ROW_NUMBER() OVER PARTITION |
label |
1 = Mother's Day buyer 2025, 0 = non-buyer | CASE WHEN Order_Date Apr-May 2025 |
4.3 Dataform Setup & Execution
Setting up Dataform takes three steps: create a repository, create a workspace inside it, and write the SQLX file. The workspace is where you edit and test SQLX files before running them.
- Repository:
walsh-retail-dataform(us-east4) — the top-level container - Workspace:
walsh-retail-workspace— your editable development environment - File:
definitions/customer_features.sqlx— the transformation definition
Once the SQLX file is saved, click Start execution to trigger the compilation and run the BigQuery job. Dataform compiles the SQLX into a CREATE OR REPLACE TABLE statement and executes it in BigQuery automatically.
Navigation: GCP Console > Dataform > Create repository: walsh-retail-dataform > Create workspace: walsh-retail-workspace > definitions/ > + > customer_features.sqlx > Start execution
4.4 RFM Feature Engineering Results

Figure 4.1. Dataform workspace — customer_features.sqlx SQLX code + Query Results preview

Figure 4.2. Dataform execution — Status: Success in 4 seconds
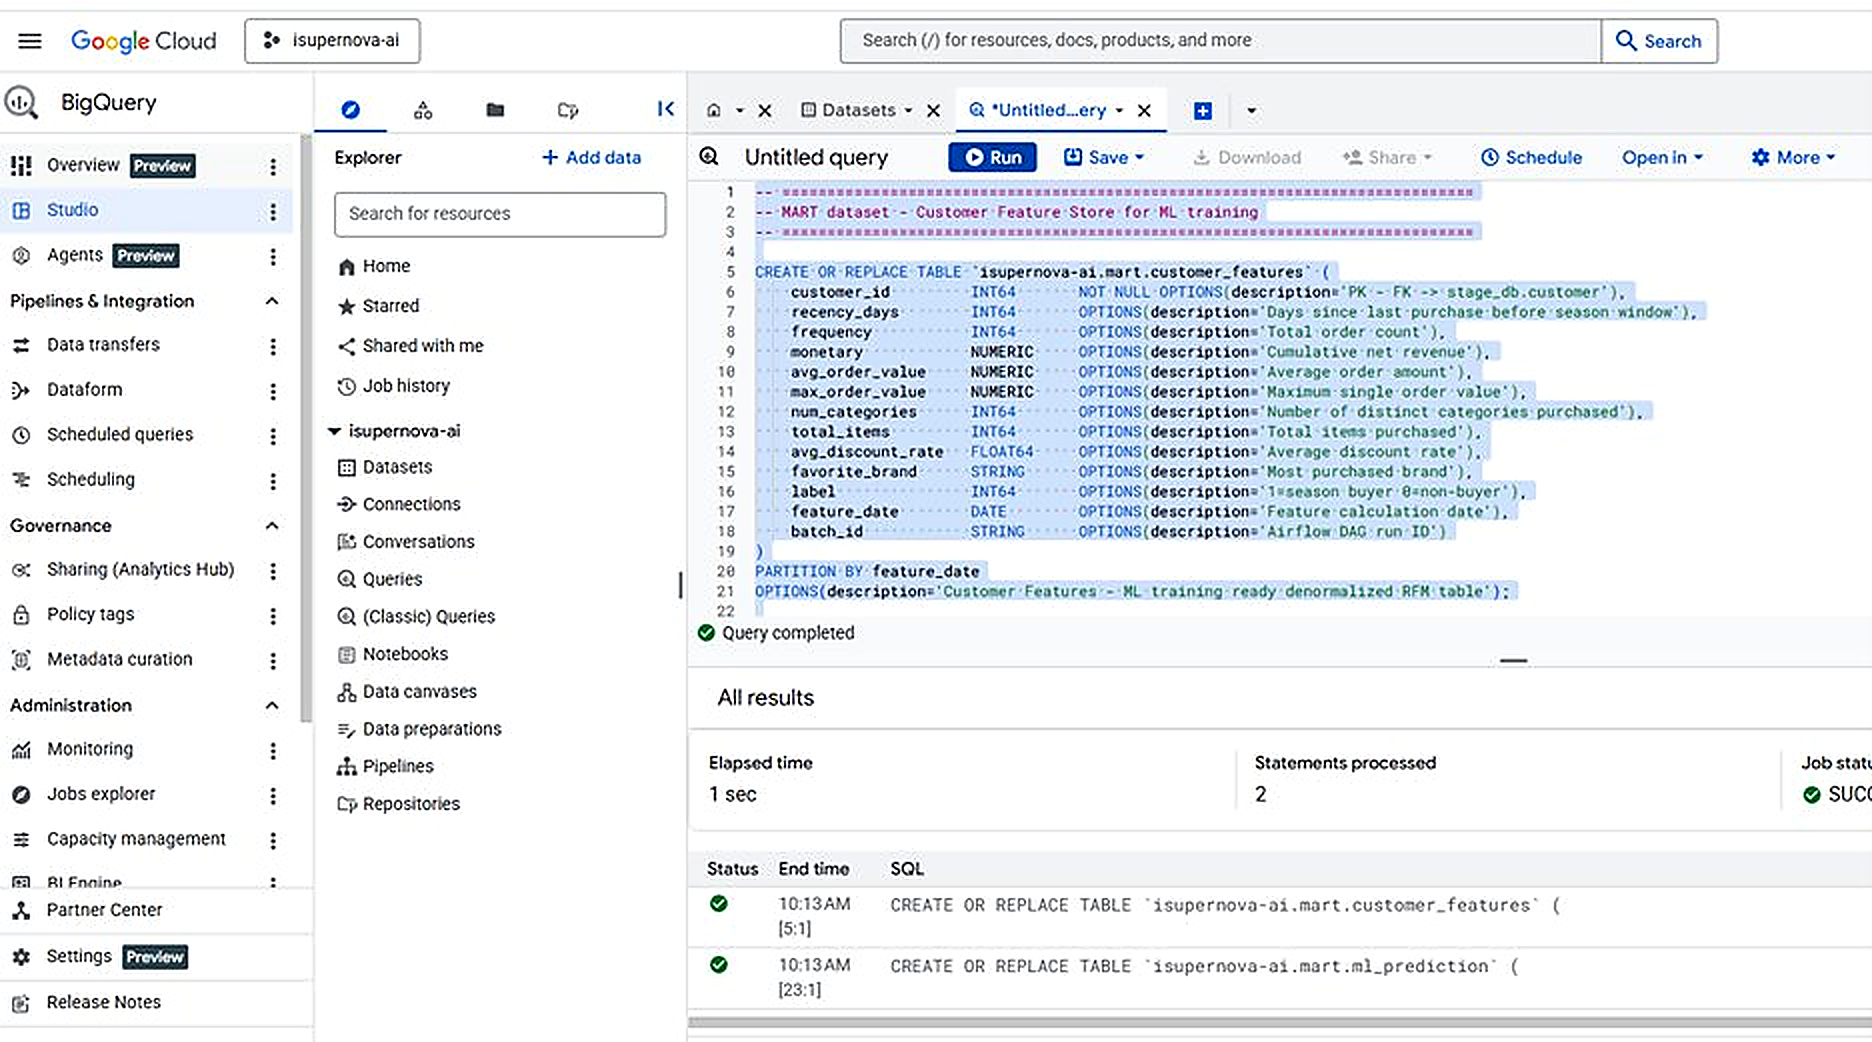
Figure 4.3. BigQuery mart.customer_features — 200 customers, all RFM features populated
All BigQuery datasets (ecommerce_db, mart, campaign, vector, log) must be in the same region. Datastream writes to us-east4 — all other datasets must also be in us-east4.
Symptom:
'Dataset isupernova-ai:ecommerce_db was not found in location US'Fix: Delete datasets created in the wrong region and recreate them in us-east4.
4.5 ml_prediction Table
A second mart table is created as an empty schema, ready to receive Vertex AI predictions in Part 3:
| Column | Type | Description |
|---|---|---|
prediction_id |
STRING | Unique prediction identifier |
customer_id |
INT64 | FK to stage_db.customer |
model_version |
STRING | Vertex AI model version |
probability |
FLOAT64 | Predicted purchase probability (0.0–1.0) |
segment |
STRING | Customer segment (Premium / Very High) |
predicted_at |
DATETIME | Prediction timestamp |
batch_id |
STRING | Pipeline run batch identifier |
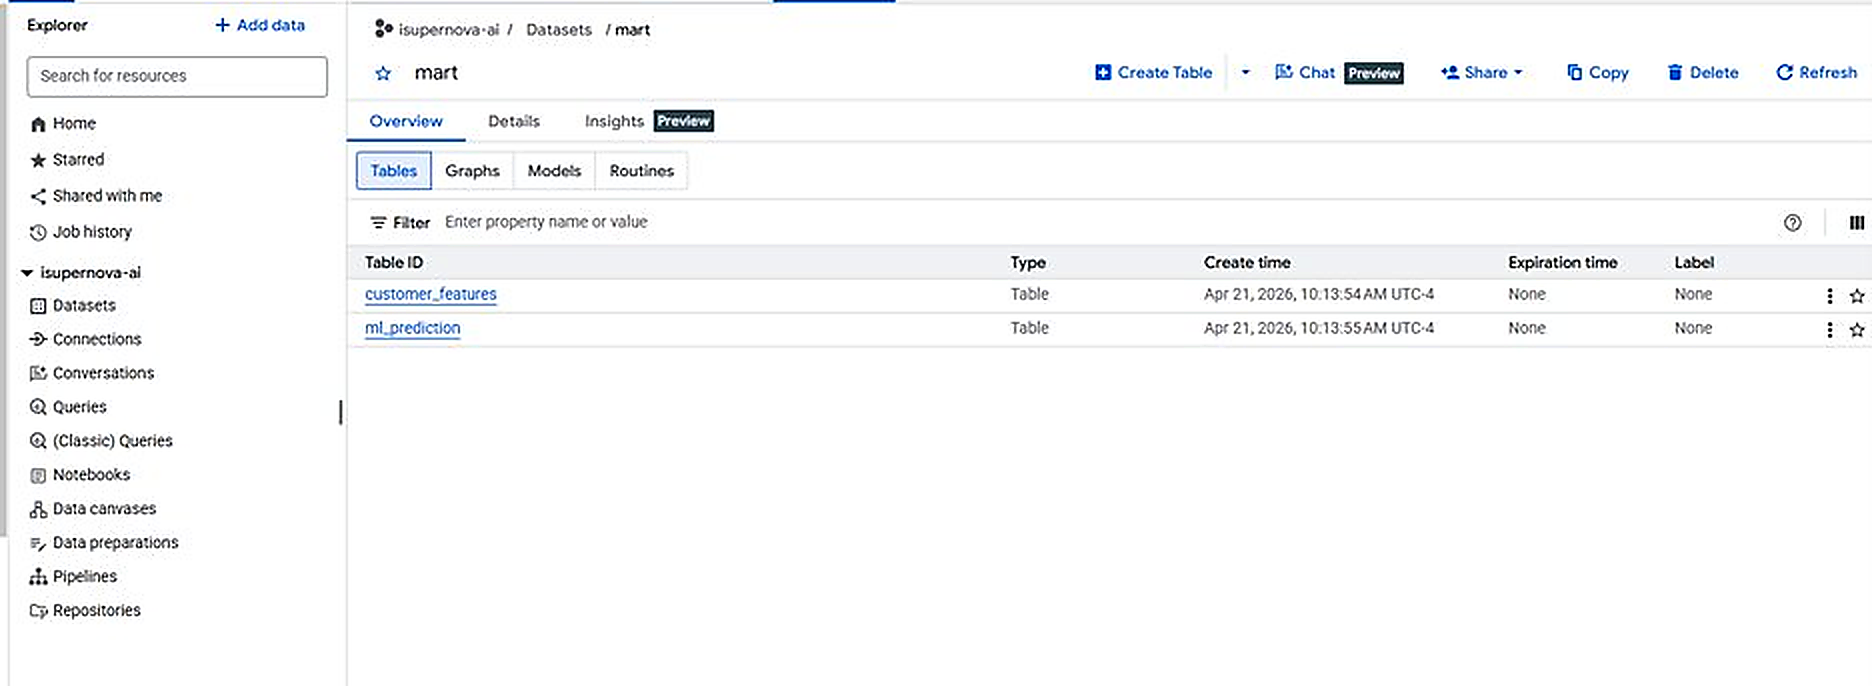
Figure 4.4. BigQuery mart.ml_prediction — Schema ready for Part 3
5. Cloud Workflows — Pipeline Orchestration
5.1 Why Cloud Workflows?
| Dimension | Cloud Composer (Airflow) | Cloud Workflows |
|---|---|---|
| Cost | ~$1.12/hour (always-on) | Near-zero (5,000 steps free/month) |
| Setup time | 20–30 minutes | Seconds |
| Language | Python DAGs | YAML definition |
| GCP Integration | Via operators/hooks | Native HTTP + OAuth2 |
| Best for | Multi-cloud, complex Python logic | GCP-native orchestration |
5.2 How Cloud Workflows Orchestrates Dataform
Cloud Workflows uses a YAML-based definition to connect GCP services via HTTP calls. Each step in the workflow maps to one API call. The default sample code that comes with Cloud Workflows is completely replaced with our custom pipeline definition.
The walsh-retail-pipeline workflow has four steps:
steps:
# Step 1: Initialize variables
- init:
assign:
- project_id: "isupernova-ai"
- location: "us-east4"
- repository: "walsh-retail-dataform"
# Step 2: Compile the Dataform workspace into a compilation result
- createCompilationResult:
call: http.post
args:
url: ${"https://dataform.googleapis.com/v1beta1/projects/" + project_id + "/locations/" + location + "/repositories/" + repository + "/compilationResults"}
auth:
type: OAuth2
body:
workspace: ${"projects/" + project_id + "/locations/" + location + "/repositories/" + repository + "/workspaces/walsh-retail-workspace"}
result: compilationResult
# Step 3: Execute the compiled workflow (runs all SQLX files)
- createWorkflowInvocation:
call: http.post
args:
url: ${"https://dataform.googleapis.com/v1beta1/projects/" + project_id + "/locations/" + location + "/repositories/" + repository + "/workflowInvocations"}
auth:
type: OAuth2
body:
compilationResult: ${compilationResult.body.name}
invocationConfig:
serviceAccount: "dataform-runner@isupernova-ai.iam.gserviceaccount.com"
result: workflowInvocation
# Step 4: Return the result
- return_result:
return: ${workflowInvocation.body.name}
The workflow runs in two phases:
- Compile —
createCompilationResultreads all SQLX files in the workspace and compiles them into a versioned snapshot. This is like a "build" step that validates the SQL before running it. - Execute —
createWorkflowInvocationtakes the compiled result and submits it to BigQuery as a job. Every SQLX file in thedefinitions/folder runs in dependency order.
Dataform separates compilation from execution so you can validate SQL changes before running them in production. The compilation result is a versioned, immutable snapshot — if the execution fails, you can re-run the same compiled version without recompiling. This separation also enables CI/CD workflows where compilation happens on code push and execution happens on schedule.
5.3 IAM Configuration
A dedicated service account dataform-runner@isupernova-ai.iam.gserviceaccount.com is created with minimum required permissions:
roles/dataform.editor— create and execute Dataform workflow invocationsroles/bigquery.jobUser— submit BigQuery jobsroles/bigquery.dataEditor— read and write BigQuery tables
All new Dataform repositories enforce strict act-as mode. The "Don't enforce" option has NO effect on new repositories. A custom service account MUST be specified in
invocationConfig.serviceAccount.Required setup:
1. Create custom SA:
dataform-runner@project.iam.gserviceaccount.com2. Grant:
roles/dataform.editor, roles/bigquery.jobUser, roles/bigquery.dataEditor3. Grant Dataform service agent:
ServiceAccountUser + ServiceAccountTokenCreator on the custom SA4. Grant Workflows Compute SA:
ServiceAccountUser on the custom SAGCP IAM changes are eventually consistent. After granting any role, wait 60–120 seconds before testing. Immediate testing may return
403 PERMISSION_DENIED even if the configuration is correct.Symptom: Same command fails then succeeds minutes later with no config change.
5.4 Workflow Execution
Navigation: GCP Console > Workflows > Create: walsh-retail-pipeline > Deploy > Execute
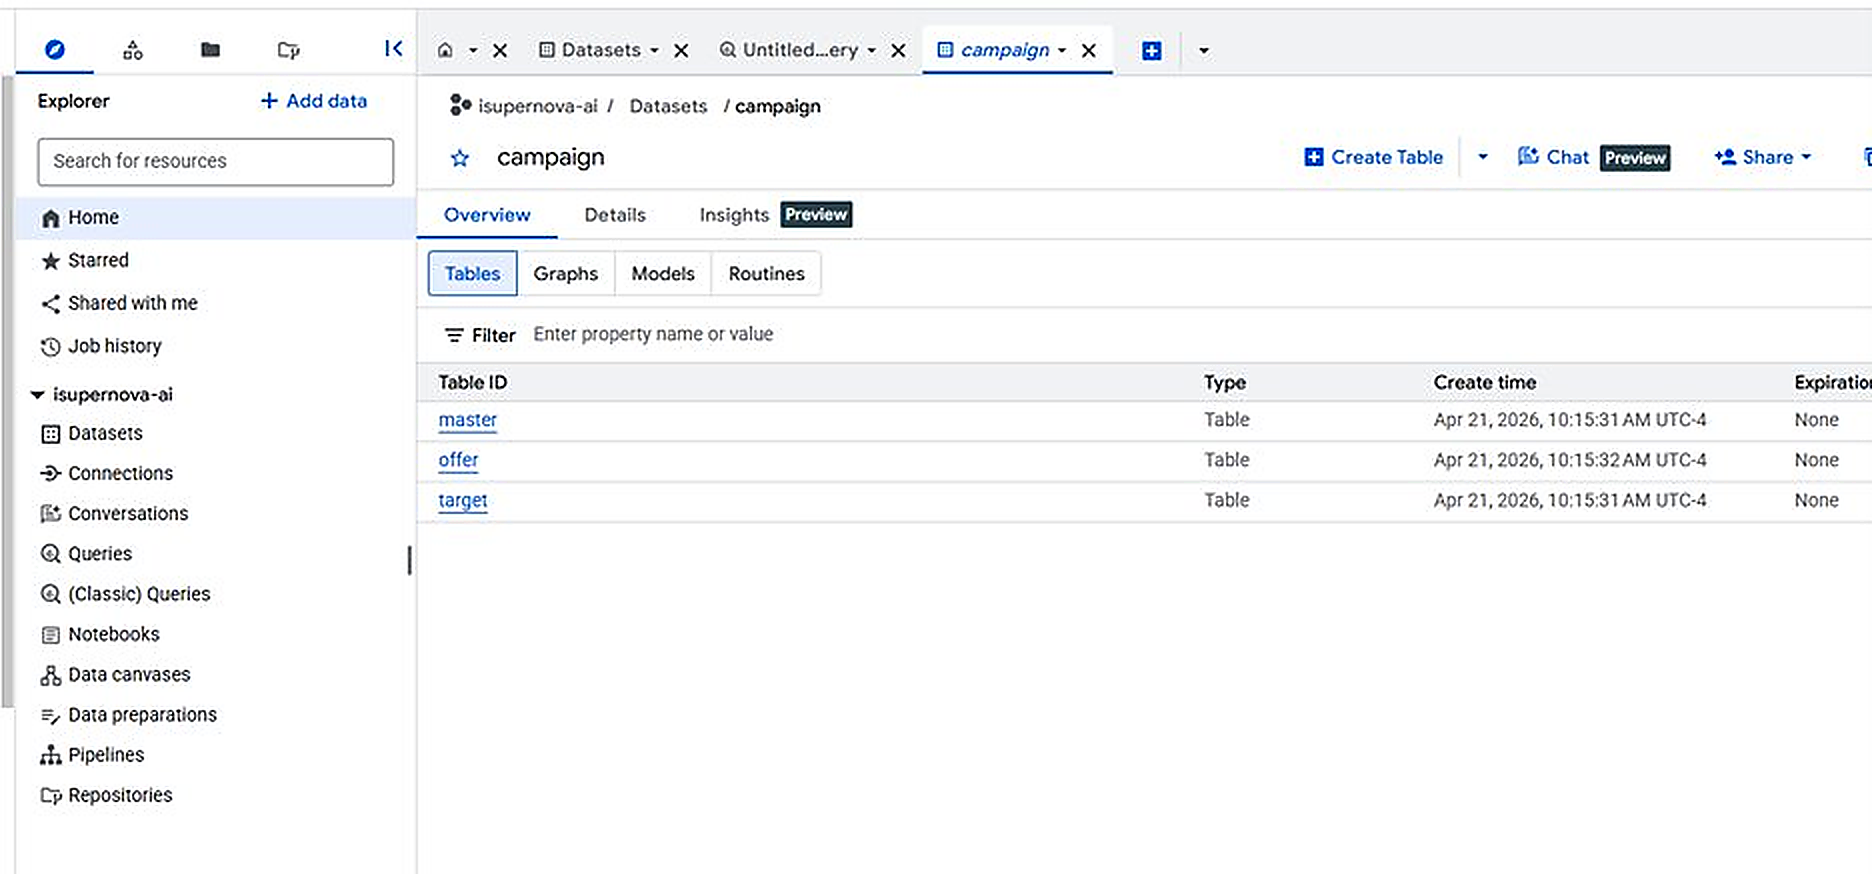
Figure 5.1. Cloud Workflows — walsh-retail-pipeline execution Succeeded in 1.004 seconds
6. Cloud Scheduler — Daily Automation
| Setting | Value |
|---|---|
| Job name | walsh-retail-daily |
| Region | us-east4 |
| Frequency | 0 1 * * * (01:00 UTC daily) |
| Target type | Workflows via HTTP |
| Workflow | walsh-retail-pipeline |
| Service account | dataform-runner@isupernova-ai.iam.gserviceaccount.com |
Navigation: GCP Console > Cloud Scheduler > Create job > Name: walsh-retail-daily > Frequency: 0 1 * * * > Target: Workflows > walsh-retail-pipeline > Create
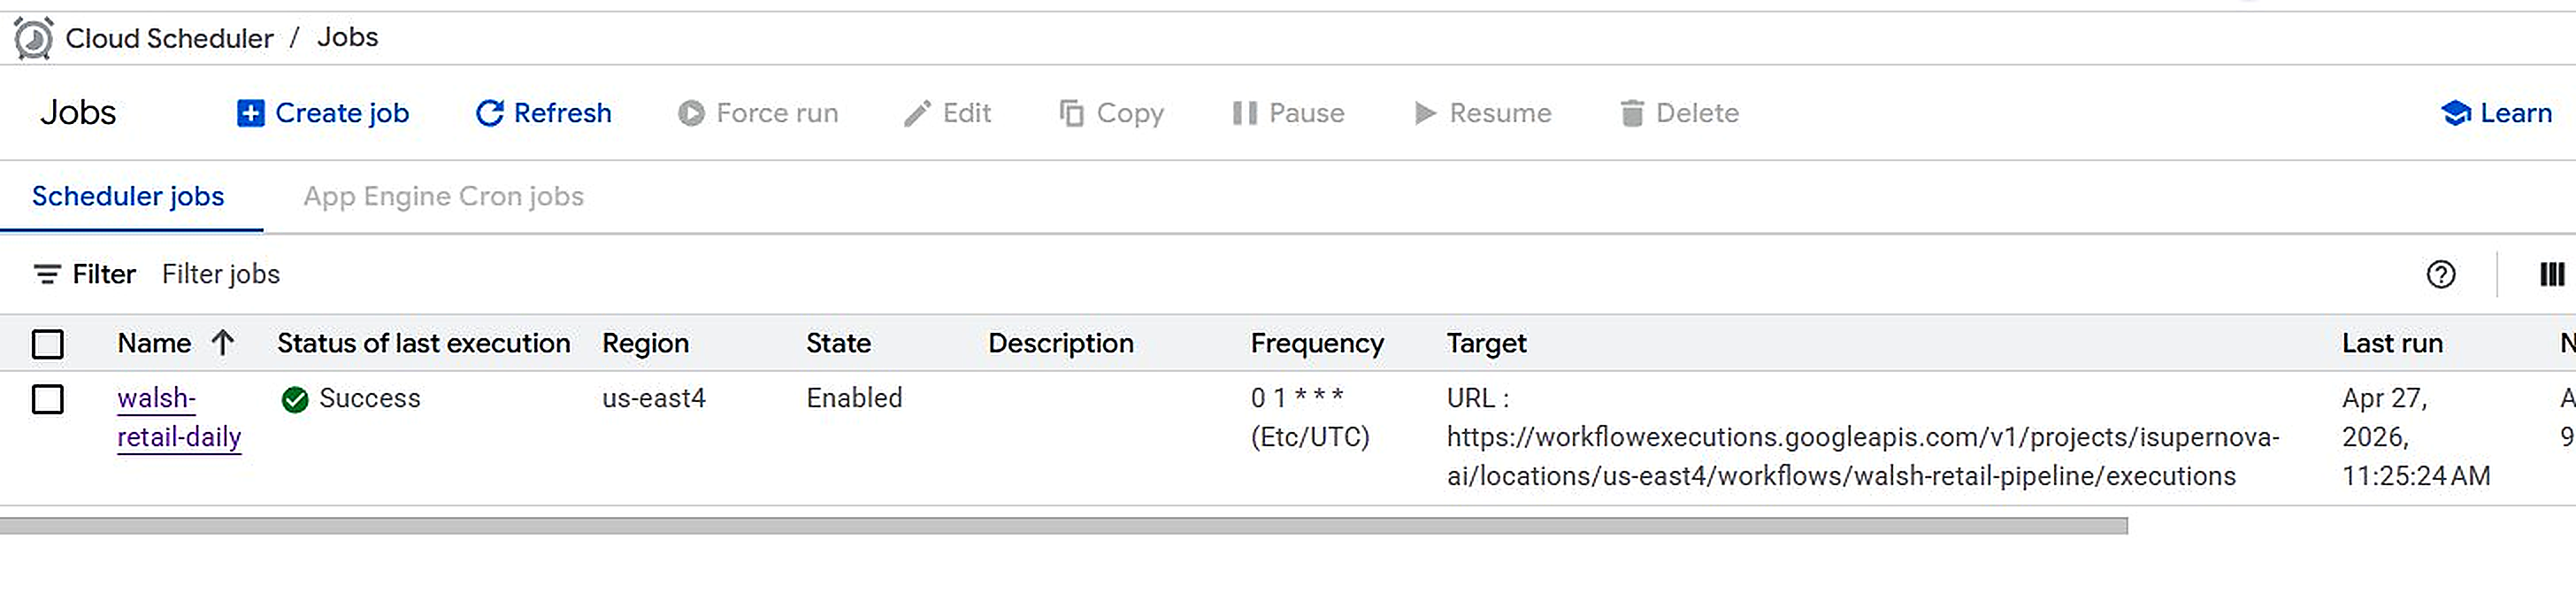
Figure 6.1. Cloud Scheduler — walsh-retail-daily Force run: Success
7. End-to-End Pipeline Verification
The full pipeline was verified end-to-end with a live UPDATE test — tracing a single data change from Cloud SQL all the way through to the final mart feature table:
| Step | Action | Result | Timestamp (UTC) |
|---|---|---|---|
| 1. Source update | UPDATE customer SET dml_flag='U' WHERE Customer_ID=1 | Cloud SQL updated | 16:10:54 |
| 2. CDC | Datastream streams change to BigQuery ecommerce_db | dml_flag='U' reflected | ~16:15 (15 min lag) |
| 3. ETL | Cloud Scheduler triggers Cloud Workflows + Dataform | mart updated | 16:44:18 |
| 4. Verify | JOIN mart.customer_features + ecommerce_db.customer | customer_update_date matched | 16:44:20 |

Figure 7.1. Cloud SQL Studio — CDC test UPDATE executed successfully
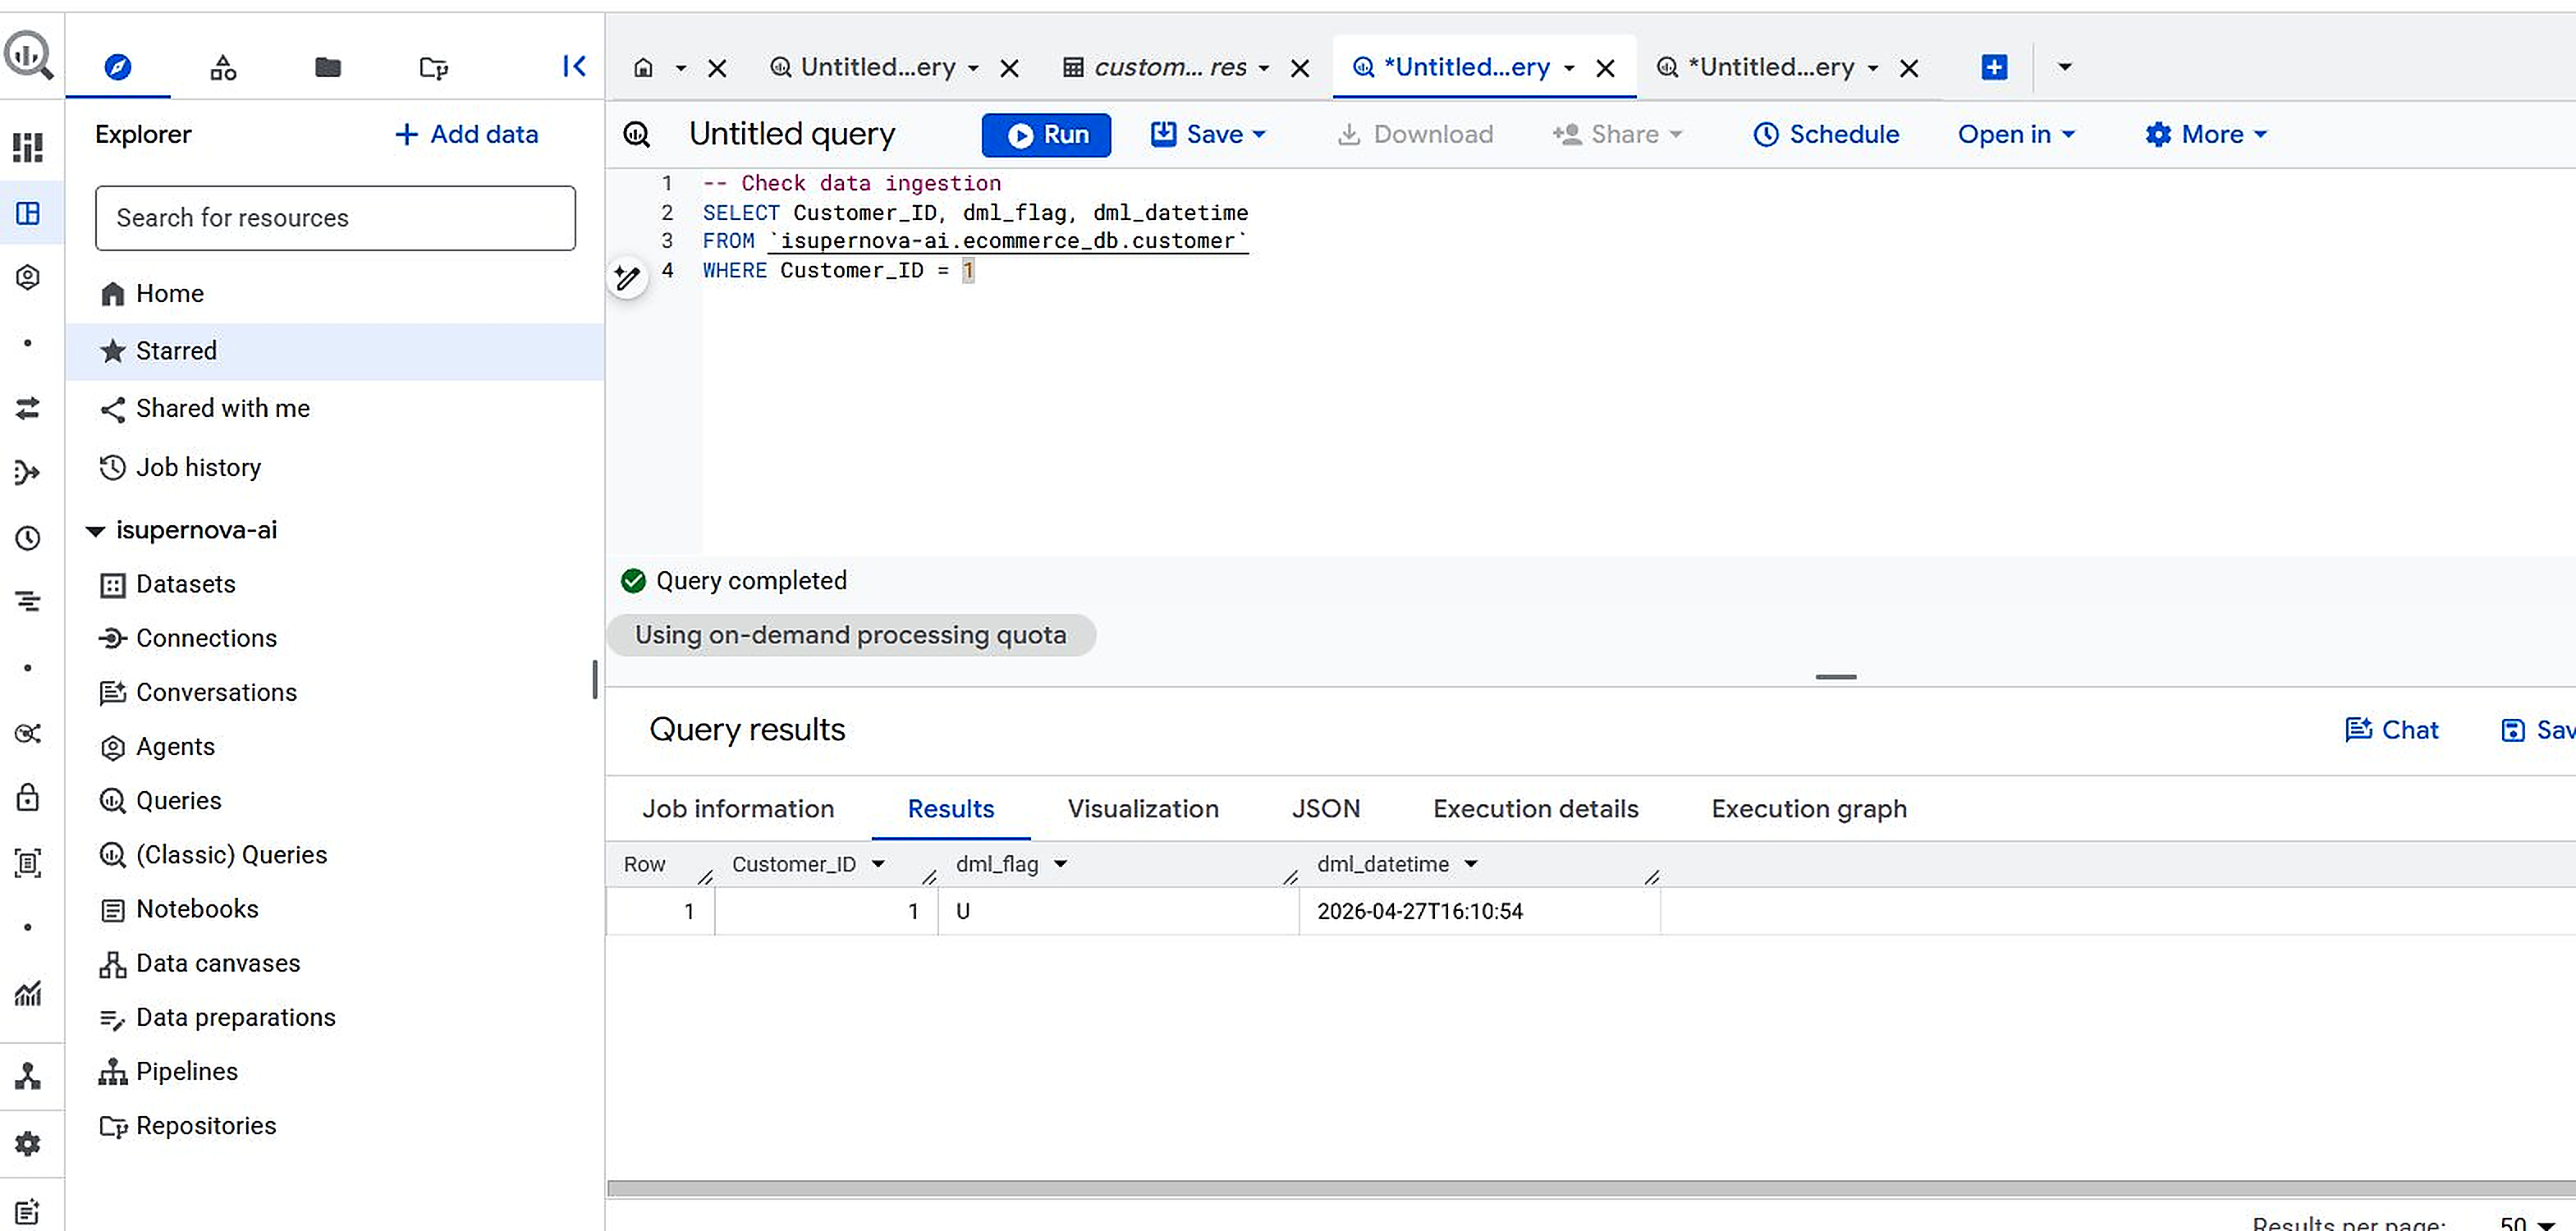
Figure 7.2. BigQuery ecommerce_db — dml_flag='U' reflected via Datastream CDC
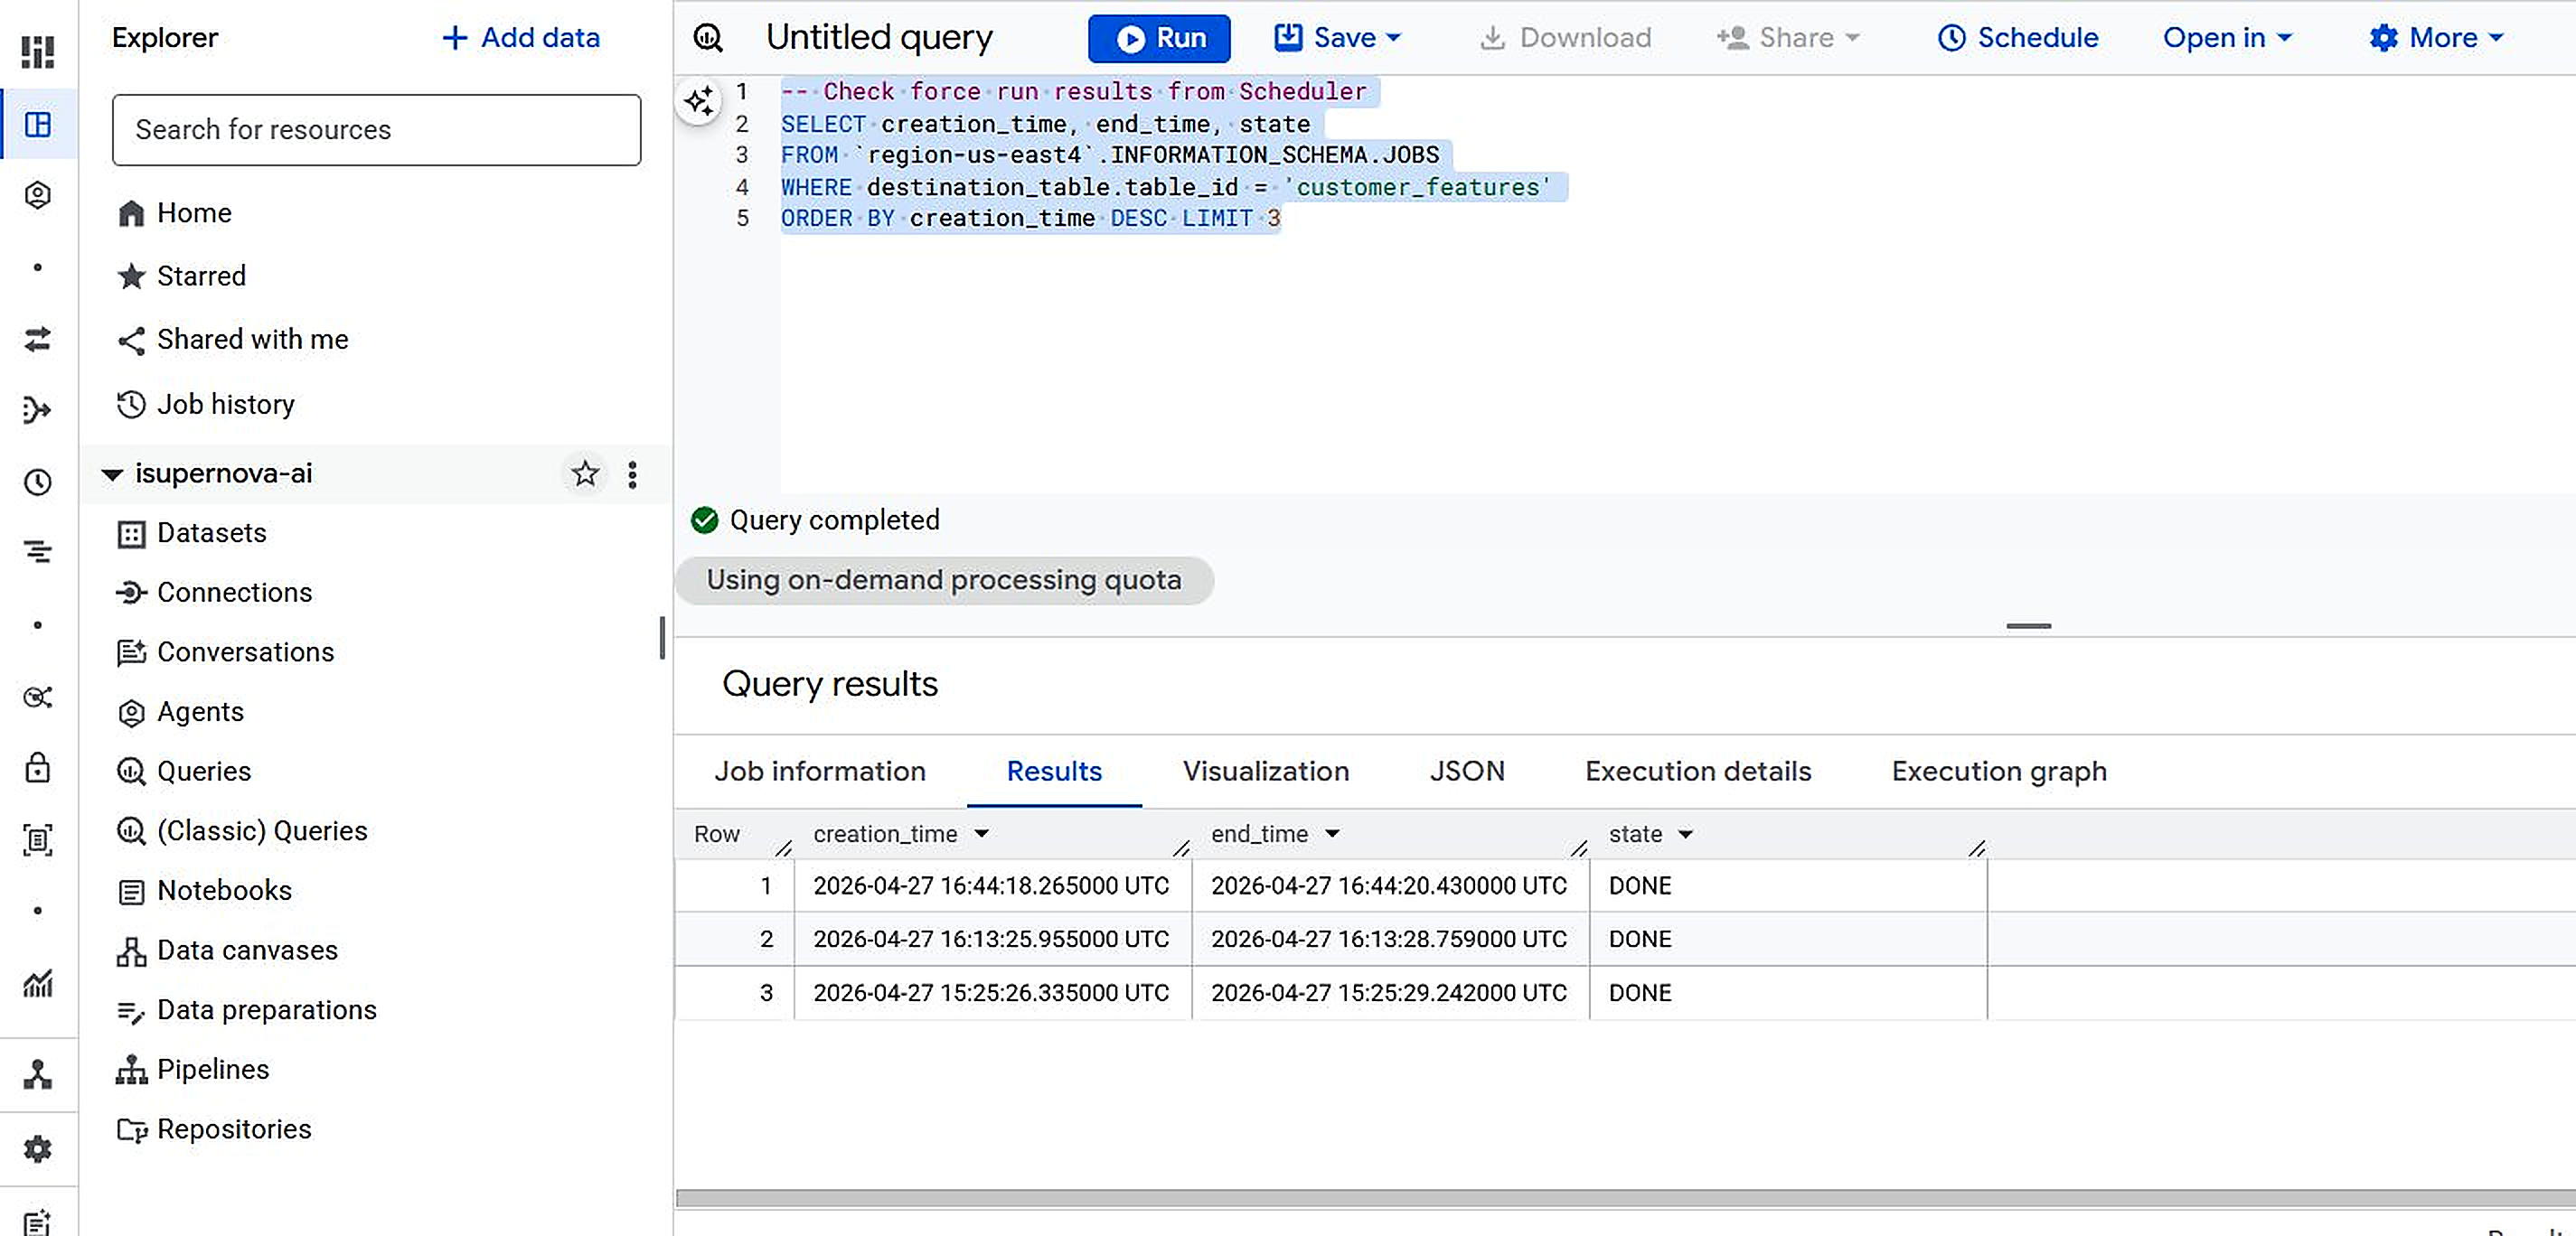
Figure 7.3. BigQuery Jobs Log — Dataform execution timestamps (INFORMATION_SCHEMA.JOBS)
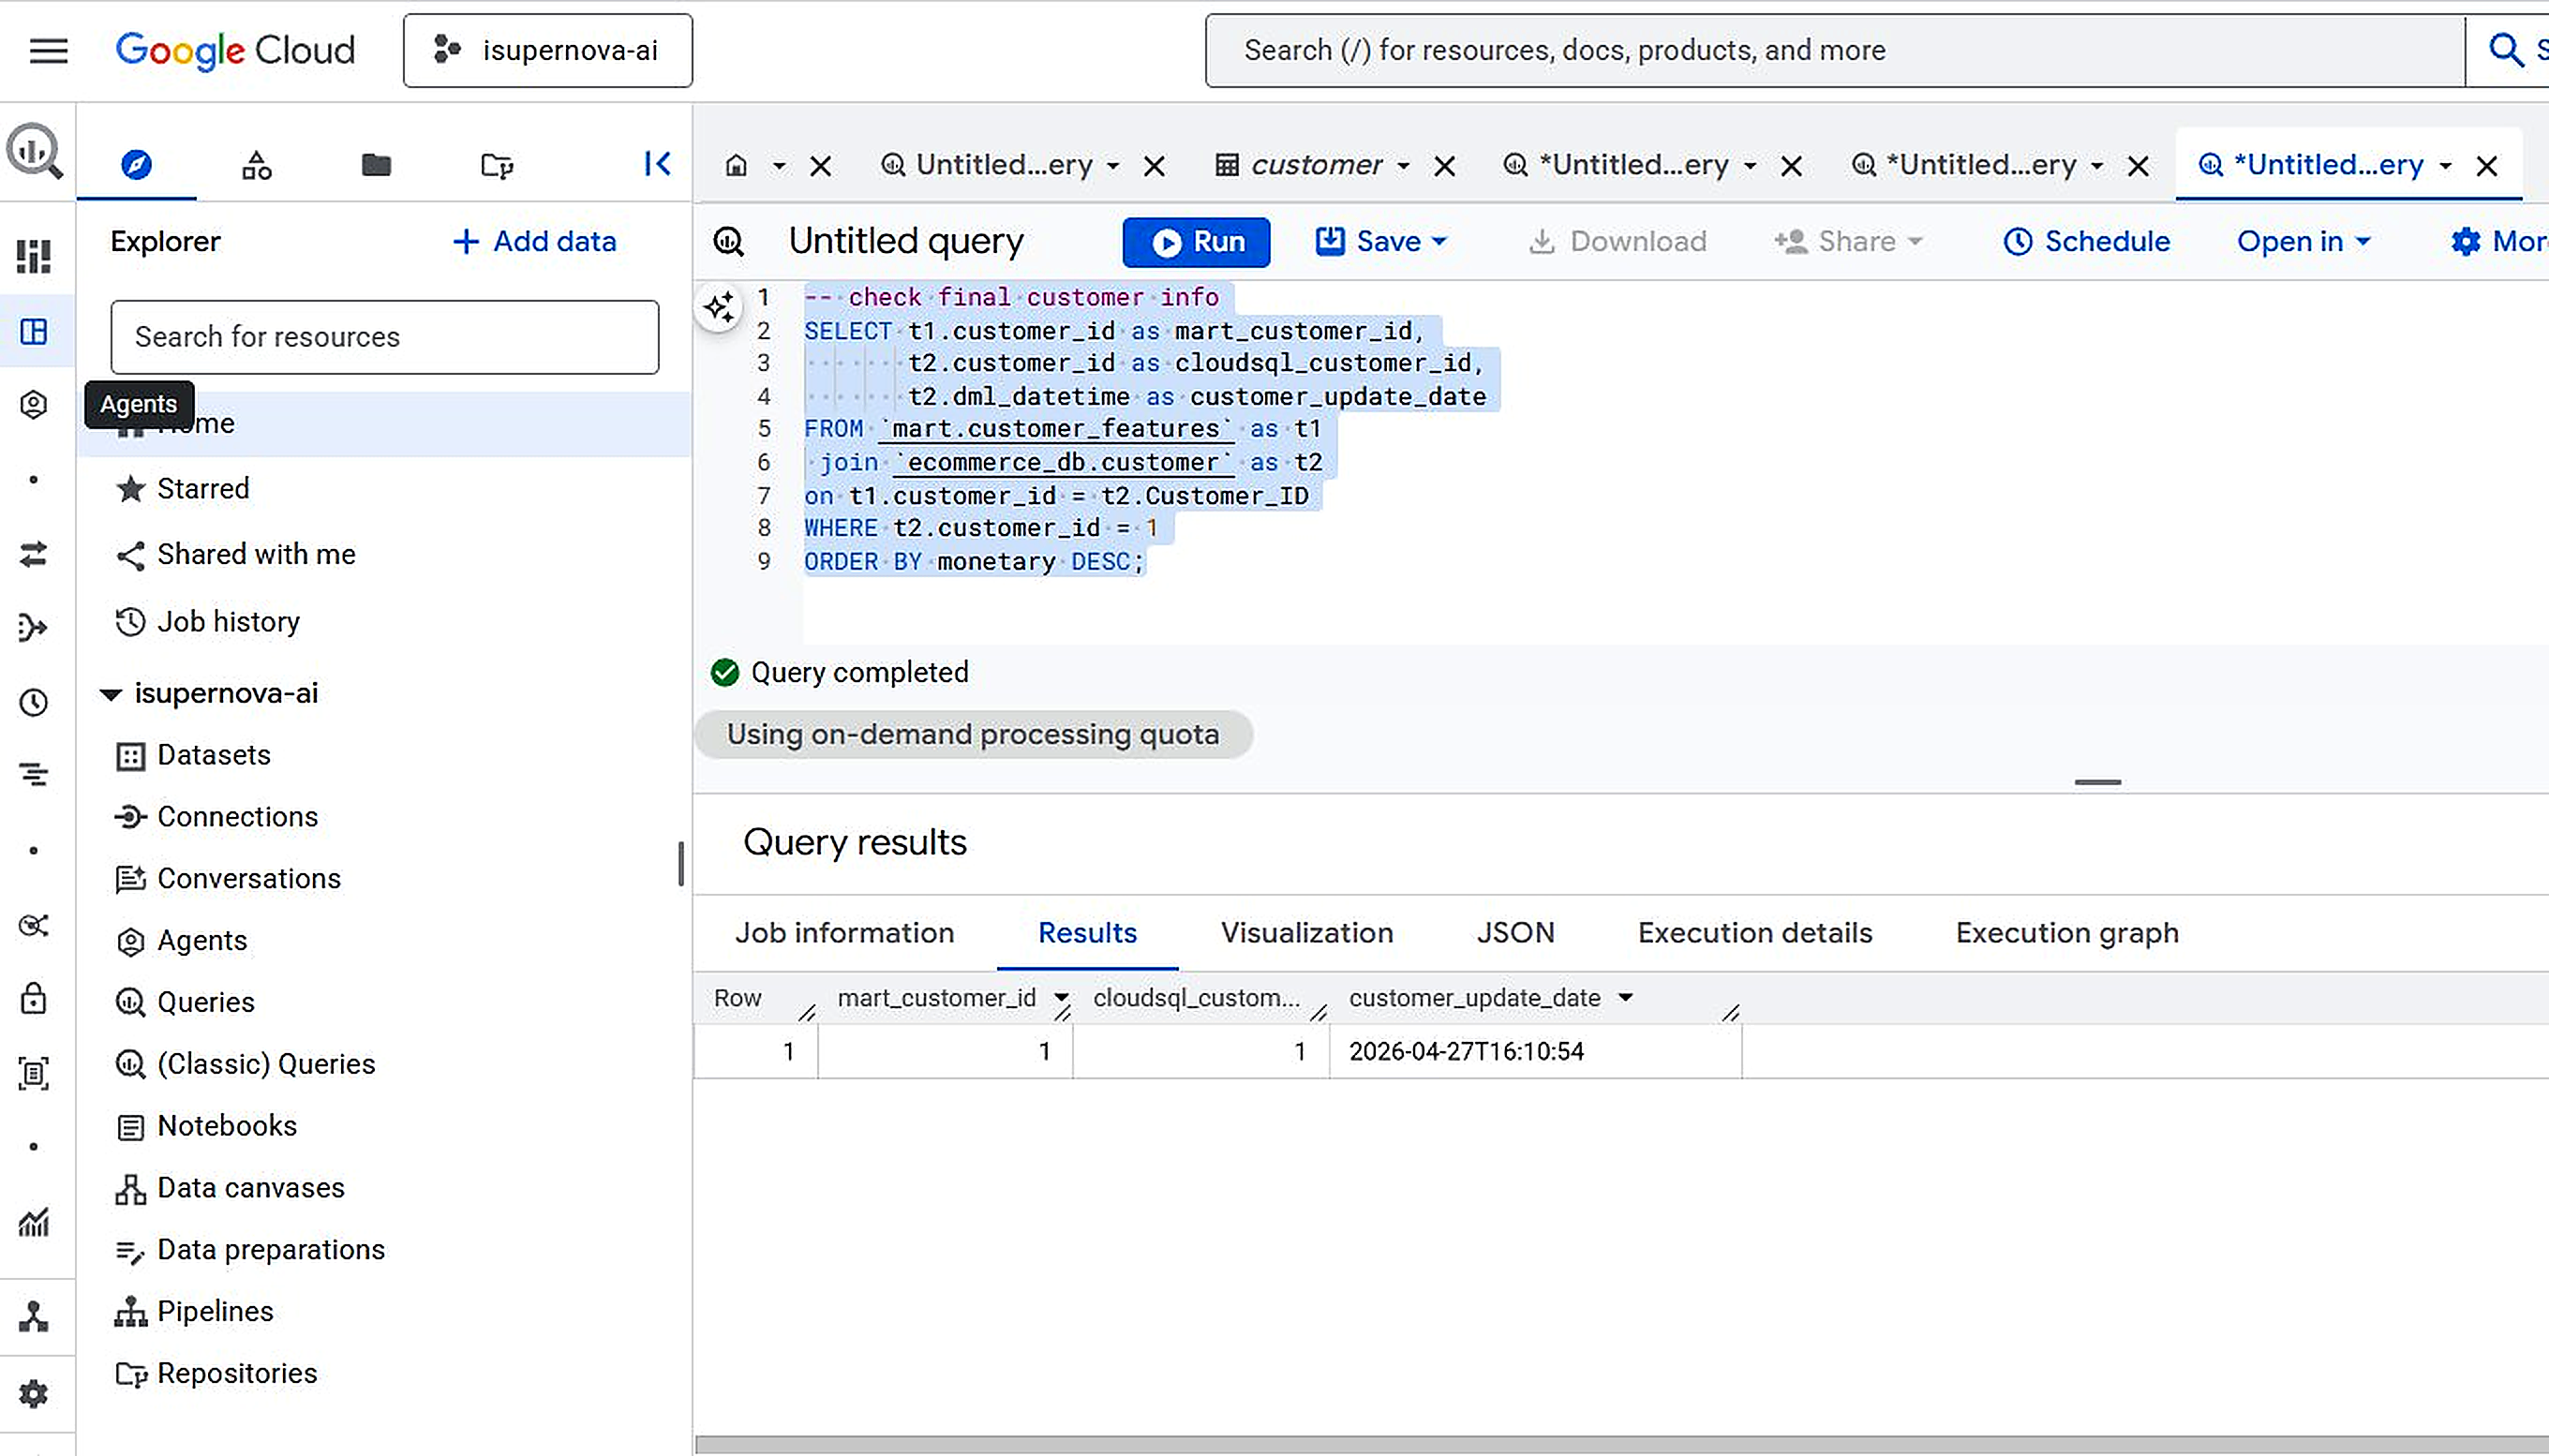
Figure 7.4. E2E Verification — mart.customer_features JOIN ecommerce_db.customer, update timestamp matched
8. Final Pipeline Diagram
The complete Part 2 Data Engineering Pipeline — from Cloud SQL through Datastream CDC, Dataform ETL, and Cloud Workflows orchestration to the final ML-ready feature store:
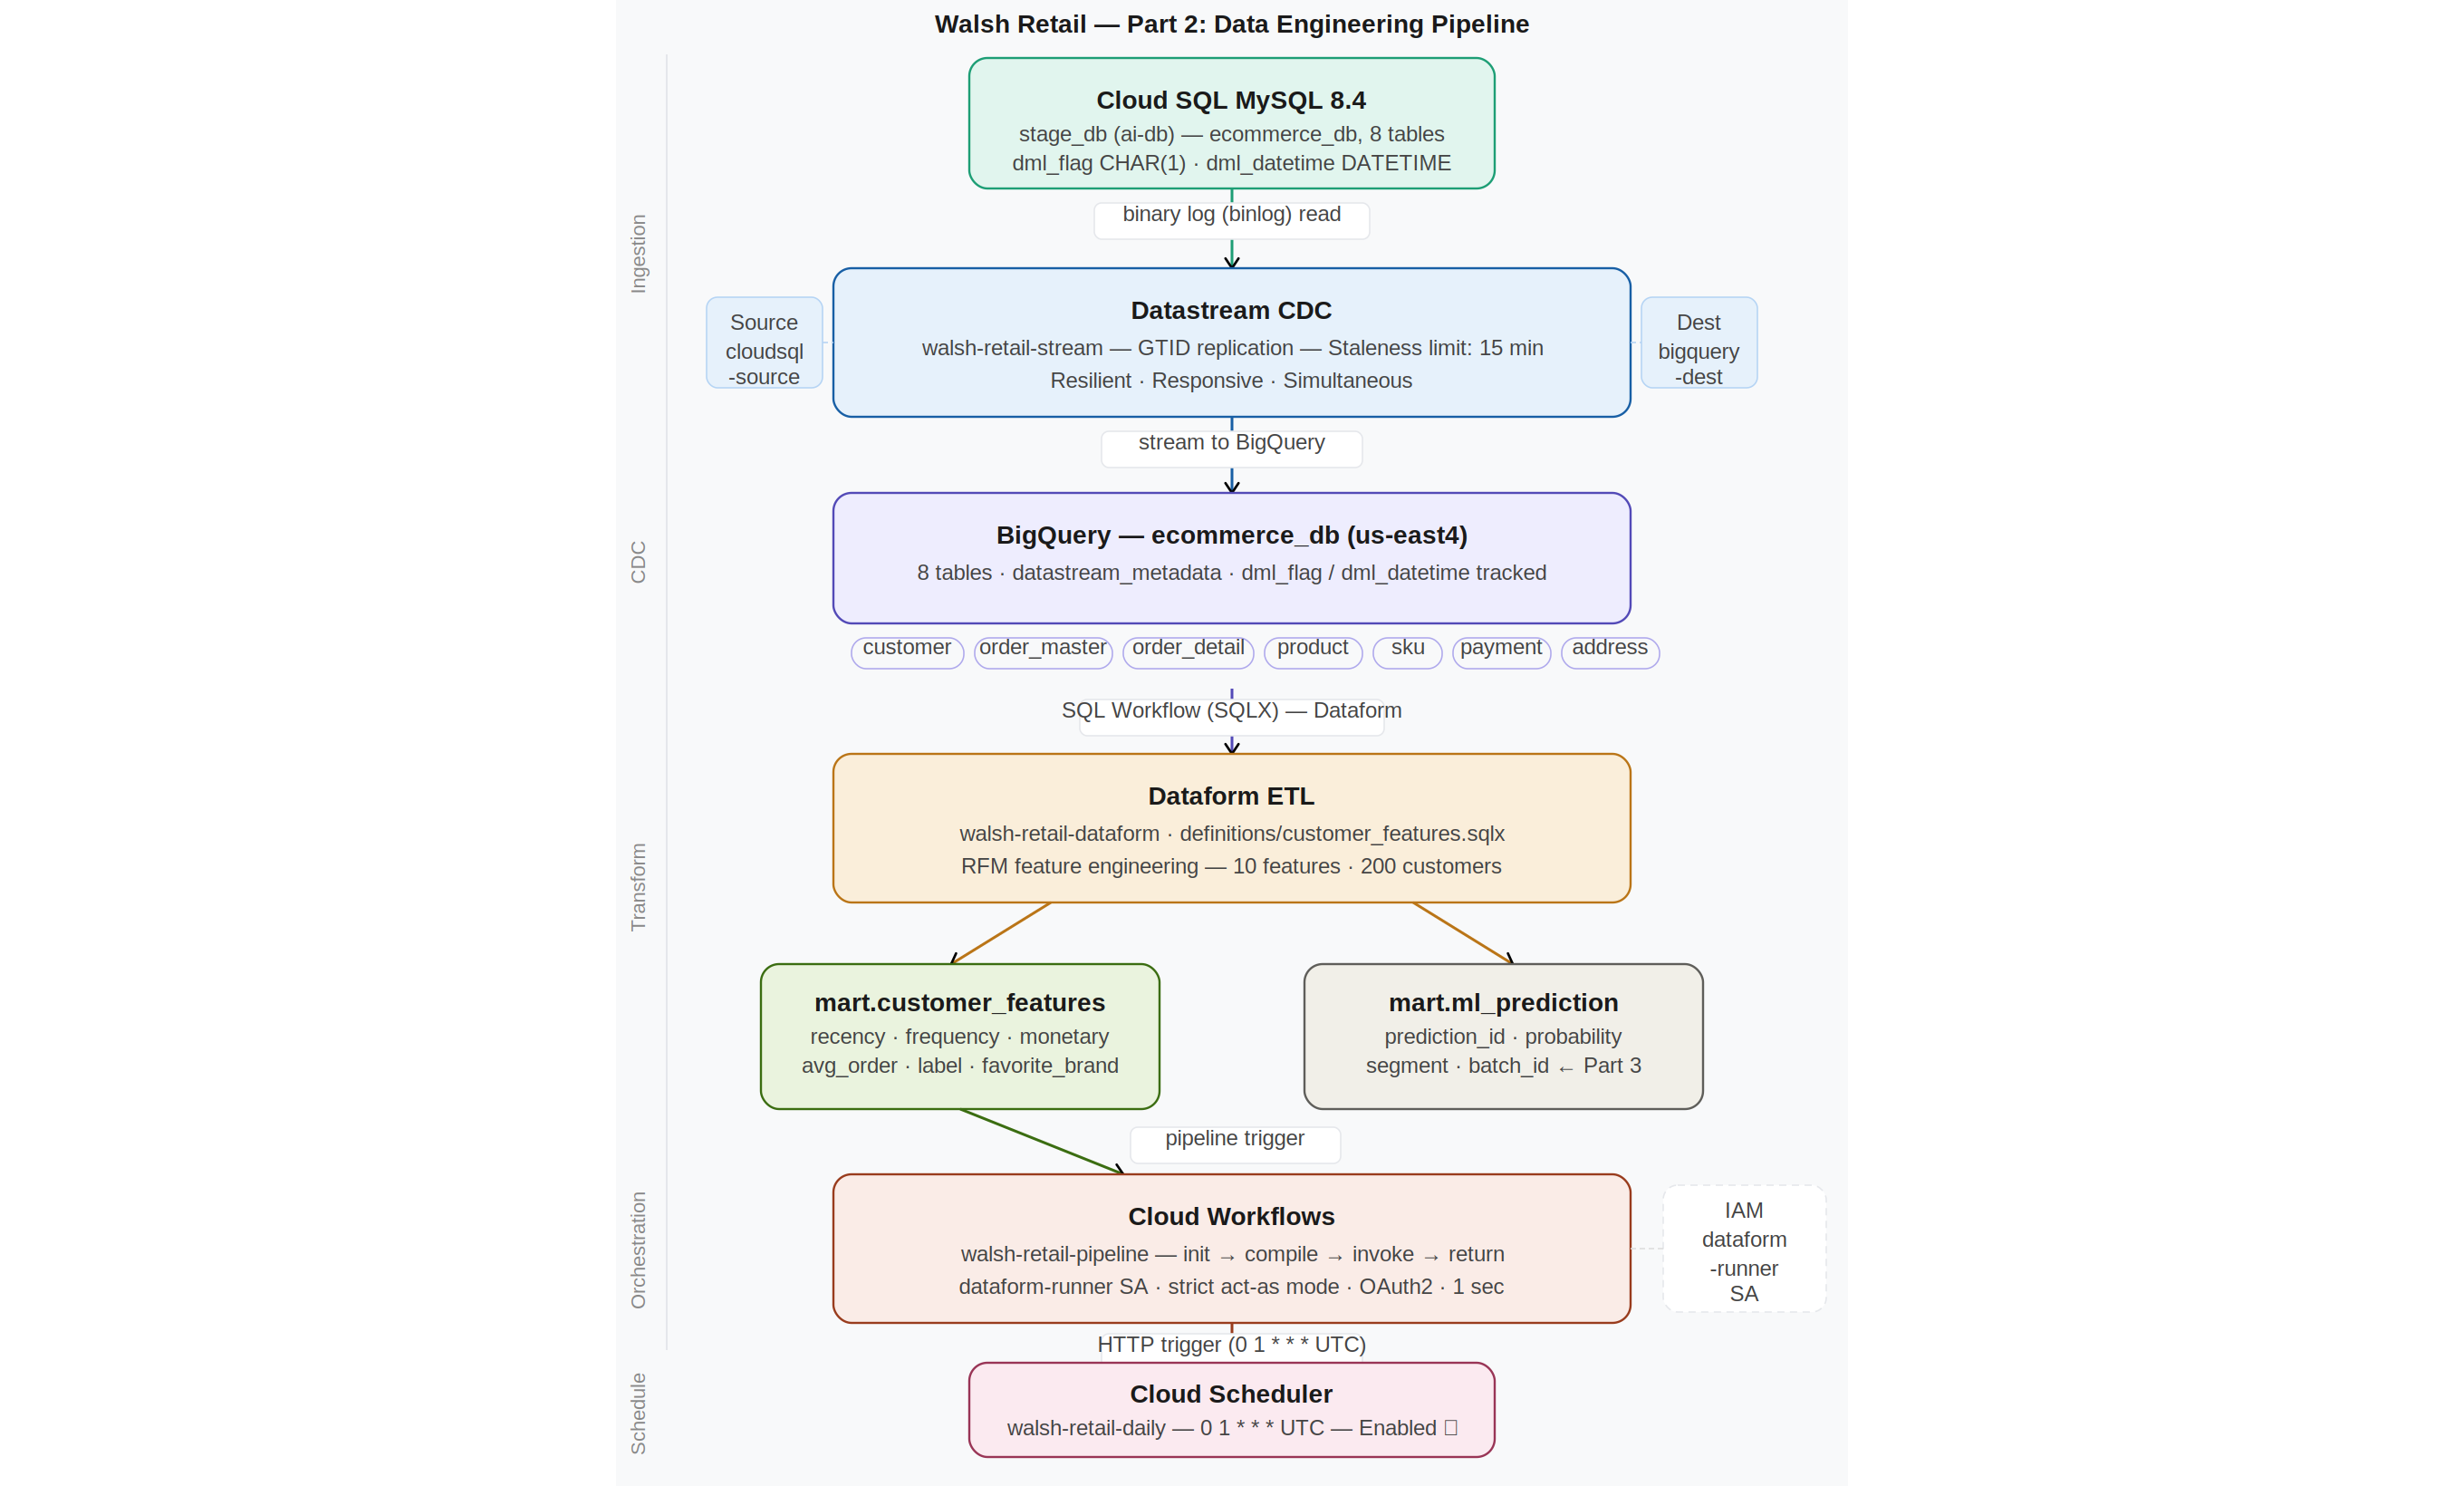
Figure 8.1. Walsh Retail Part 2 — Complete Data Engineering Pipeline
With the Data Engineering Pipeline complete — real-time CDC streaming from Cloud SQL to BigQuery, RFM feature transformation via Dataform, and daily automated orchestration via Cloud Workflows and Cloud Scheduler — the Walsh Retail AI Agent now has a continuously updated, ML-ready feature store.
In the next post, we will build the Intelligence Layer — training the Random Forest model on Vertex AI, implementing RAG with BigQuery Vector Search and LangChain, and generating personalized campaign offers with Gemini API. Stay tuned for Part 3.
Coming up in Part 3: Vertex AI + Gemini API + LangChain + RAG
ML model training, RAG pipeline with brand embeddings and Vector Search, and personalized offer generation with Gemini API.
The sample data and source code for this project are available upon request. Feel free to reach out via the contact page.